Jira Service Management
Send BigPanda incidents to Jira Service Management (JSM) to create alerts and trigger notifications. This webhook-based integration pushes rich incident data to JSM, including AI analysis, changes, and similar incidents.
Supported Version | Type | Authentication |
|---|---|---|
Jira Cloud | Native app | API Key and Bearer Token |
JIRA and JSM Connectors
The JSM data connector enriches standard Jira issues with JSM-specific data. You must first connect a Jira project for incident management and automation. See the Jira Data Connector documentation for steps on connecting a Jira project.
Key features
Detailed natural-language summary of the BigPanda incident and its correlated alerts.
Troubleshoot faster and easier with suspected root cause.
See similar incidents and changes related to your ticket.
EU-data residency ensures EU organizations keep their data in region.
AI Analysis in the BigPanda panel
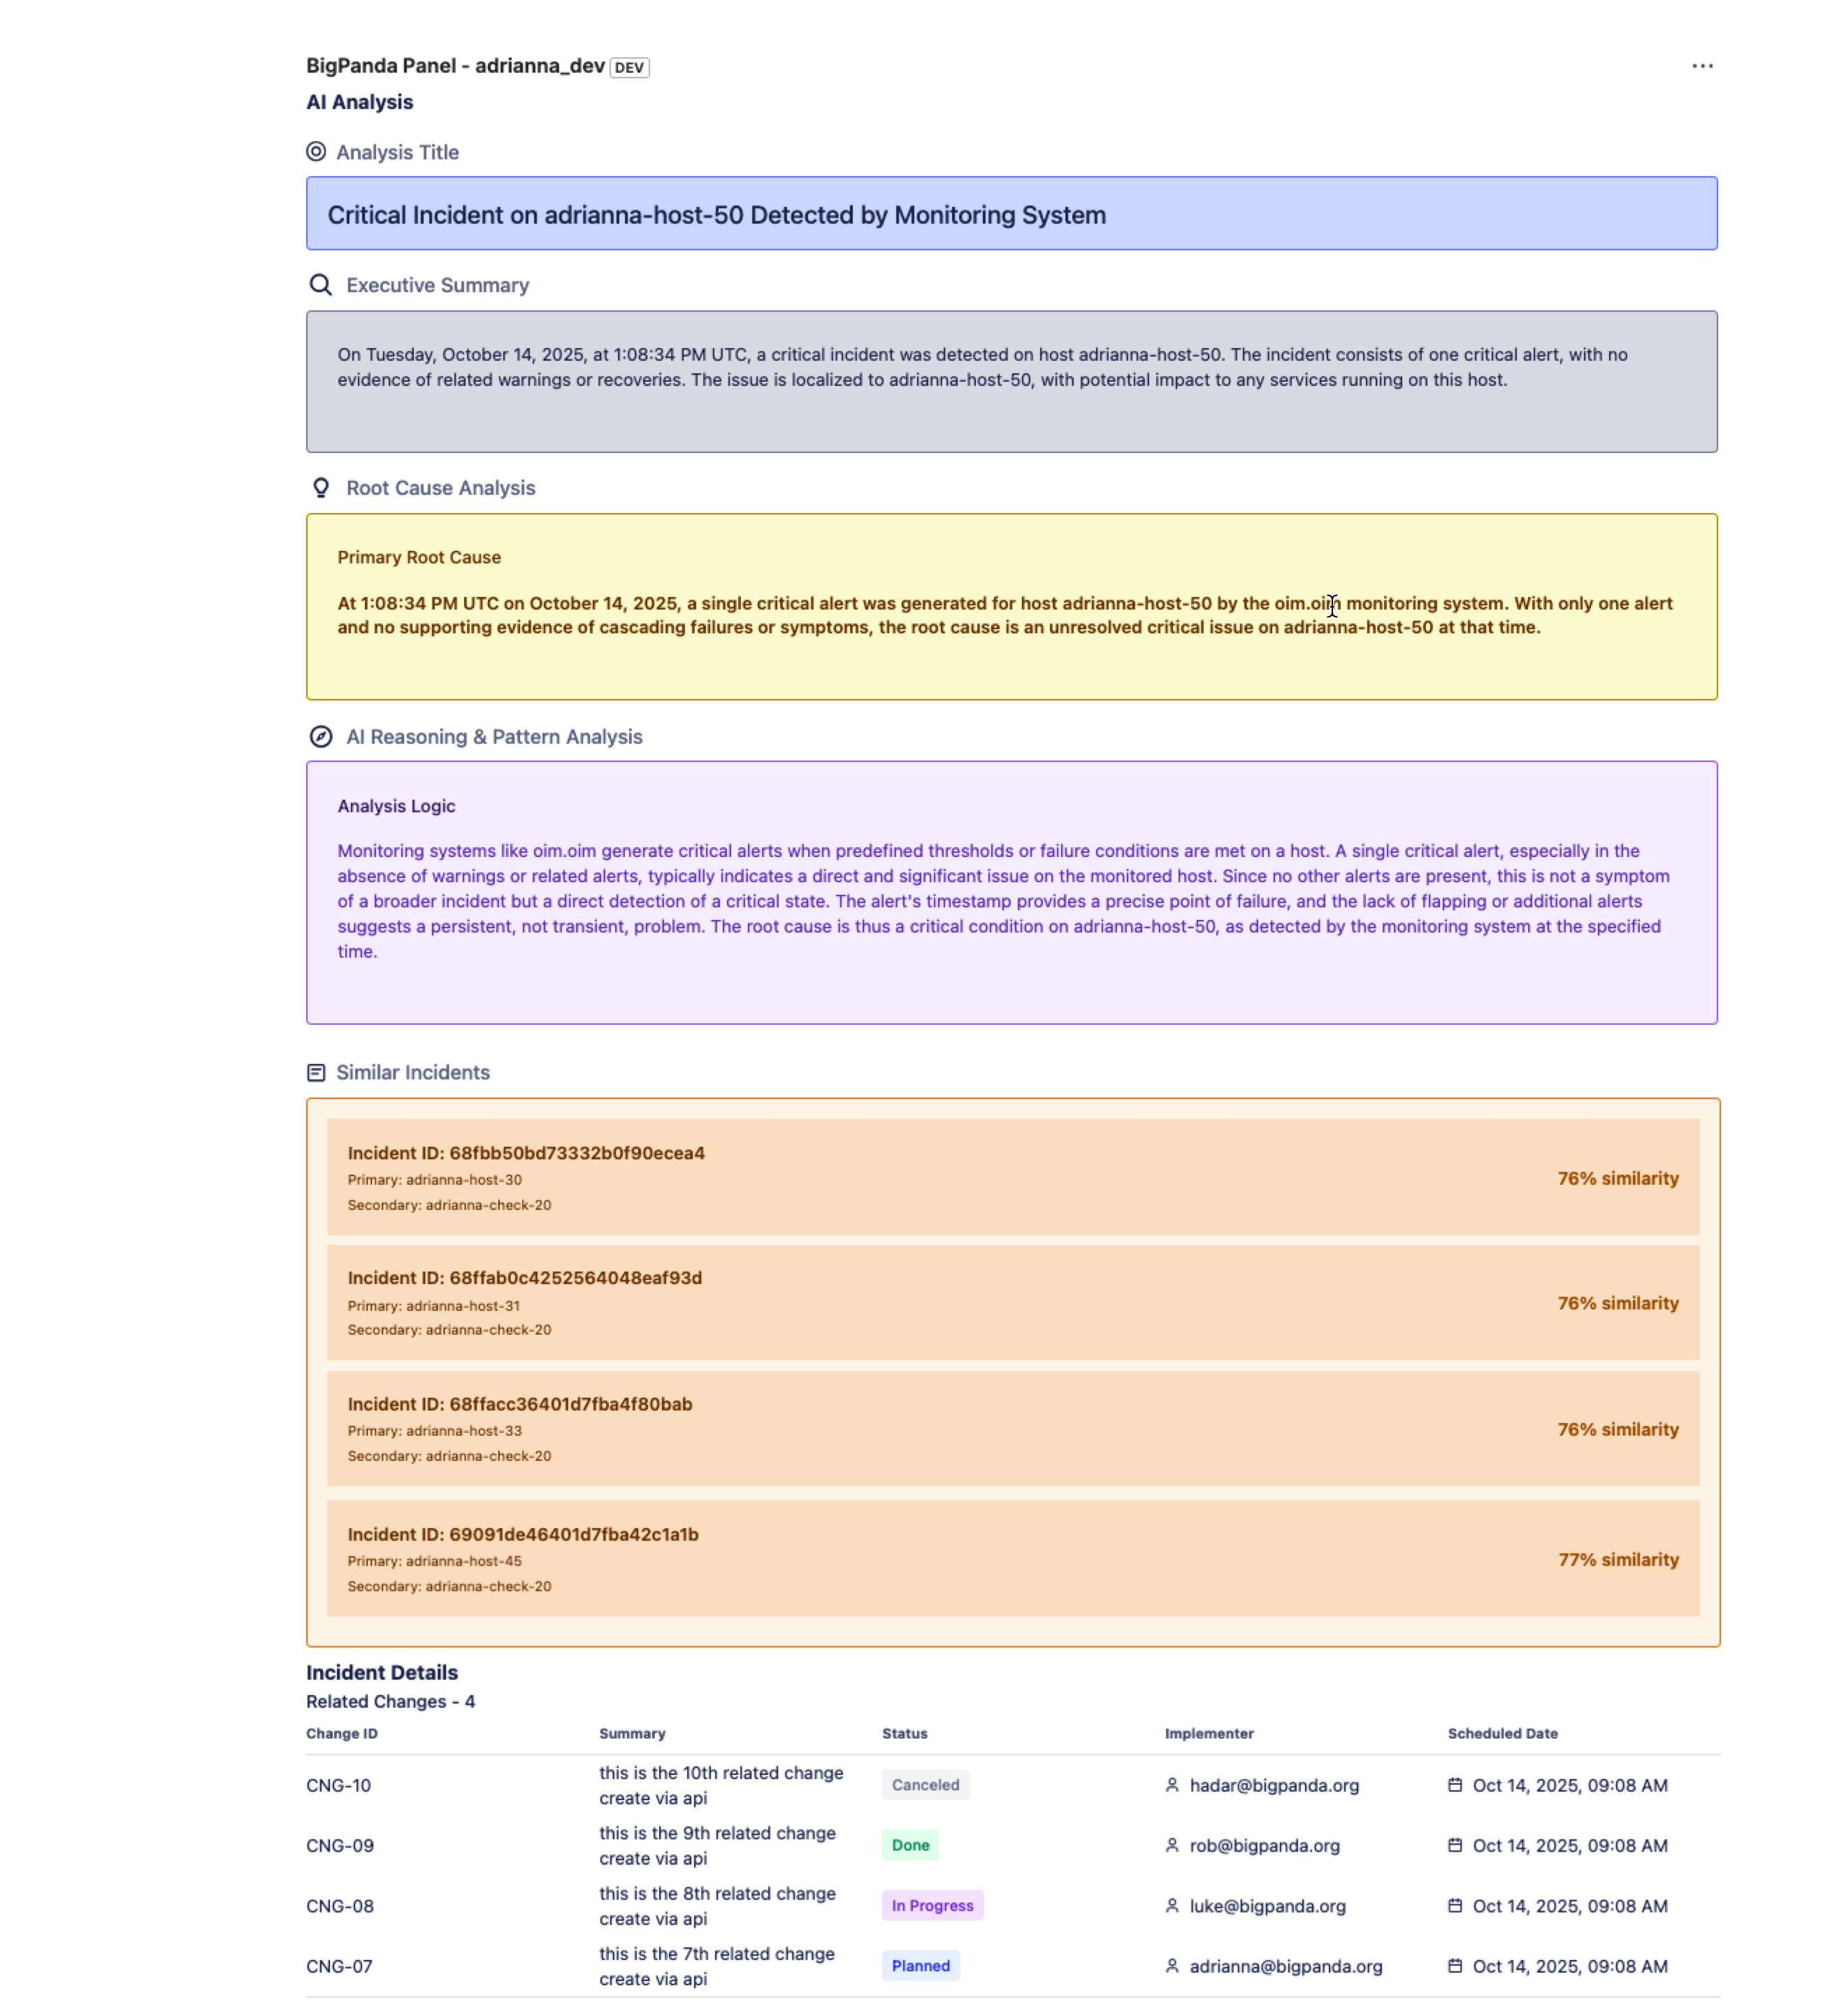
Users who have the AI Analysis configured for their organization will automatically see an AI analysis of the BigPanda incident that generated the JSM request. This analysis is included just below the request description and includes the following fields.
Field | Description |
|---|---|
Analysis title | A high level description of the incident. |
Executive summary | A summary of the alert data, key impact, and situation changes for the incident. |
Root cause analysis | The timeline and context of alert events. Describes how these alert events might be related. |
AI reasoning & pattern analysis | The explanation of the logical path the AI traveled to suggest the root cause. |
Similar Incidents | A list of the incidents that are most similar to the incident that generated this request. The score is calculated using similarity categories based on entity, problem, impact, and topology. (See our Similar Incidents documentation for more details.) |
Related changes | A detailed list of changes that occurred shortly before or during the incident. (See our Root Cause Changes documentation for more details.) |
Install the Jira Service Management integration
Use the following instructions to create and configure a Jira Service Management integration.
Install the BigPanda app in Jira Service Management
Admin permissions are needed to install the BigPanda application in JSM. To install and authorize the app:
In the BigPanda console, navigate to Settings > API Keys to create a new API key. You will need this for authorizing and configuring the integration. Once you generate the API key, be sure to copy and save it, as this key will only be visible once.
Add the BigPanda JSM app from the Atlassian Marketplace and follow the instructions in Jira's documentation for installing a new app.
To finish installing, either click Get Started on the installation popup, or go to your admin panel (admin.atlassian.com) and navigate to Apps > Sites > [Your Site] > Connected Apps > BigPanda (JSM) > … > Get Started. Then configure the following fields:
Select usage region: EU users should select
eu.bigpanda.io. Everyone else should selecta.bigpanda.io.API Key: The BigPanda API key you created in the previous step.
Click Save to finish.
Note: the Webtrigger URLs at the top of this configuration page will be needed later in the installation process.
Create an API integration in Jira Service Management
Once the BigPanda app is installed and configured, you will need to create two integrations in JSM: the API integration, and a webhook integration. First, you need to create an API integration.
Navigate to Teams > [Your team] > Go to operations.
(Note: Integrations must be created via the tab on a team’s operation page, but they can be configured to apply to all teams in your organization.)
From the Operations overview page, select the Integrations tab, then click Add integration.
Run a search and select API. (Note that the BigPanda integration found in this search is not the currently supported version and will not work.)
On the next screen, enter a name for the integration.
(Optional) Select a team in Assignee team if you want a specific team to receive alerts from the integration. Select None if you want the integration to be available for all teams in your organization.
Note: If you assign this API key to a specific team, all BigPanda integrations that use this API key will only send alerts to the specified team. To change which team(s) receive alerts, edit your integration and use a different API key that assigns alerts to the desired team.
Select Continue to save the Integration and open the integration settings page.
On the integration settings page, copy the API key. You’ll need this to finish configuring the integration in BigPanda later.
Click Turn on integration.
Create a webhook integration in Jira Service Management
Next, create a webhook integration.
From the Operations overview page, select Integrations and then Add integration.
Run a search and select Webhook.
Enter a name for the organization.
(Optional) If you want a specific team to receive alerts from the integration, in Assignee team, select that team. Select None if you want the integration to be available for all teams in your organization.
Select Continue to save the Integration.
On the integration settings page, click Edit to open the JSM BigPanda settings.
In this modal, select Authenticate with a Webhook account.
Copy the JSM Webhook Integration URL from the BigPanda app configuration screen in step three. Paste into the Webhook URL field.
Tick the boxes for Add alert description to payload and Add alert details to payload. Then click Save.
On the integrations setting page, scroll down to Alert actions and check the following values:
Alert is created
Note is added
Alert is closed
(Note: If you do not see these configuration options, make sure that you’ve enabled Post to Webhook URL for Jira Service Management alerts.)
Click Turn on integration.
Configure a new Jira Service Management integration
Once the BigPanda JSM app is installed in Jira, you can create individual integrations. Each integration corresponds to a specific Jira Service Management Space (Project) and needs to be configured through the BigPanda JSM app in Jira.
Create an app key
Create an app key in BigPanda.
Integration specific
You'll need a separate app key for each integrated system.
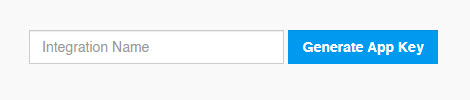
App key configuration in BigPanda
Configure the webhook in BigPanda
Once you’ve completed all the configuration steps in Jira Service Management, use the form below to specify the callback URL and authentication details. (For more details on configuring a webhook and available parameters, see the Notifications Webhook documentation.)
Go to your admin panel (admin.atlassian.com) and navigate to Apps > Sites > [Your Site] > Connected Apps > BigPanda (JSM) > … > Get Started. Copy the BigPanda Integration URL from the app configuration page and paste it in the Callback URL field in the BigPanda webhook form.
For the header
x-bp-app-key, the app key for this integration should be auto-filled. (If not, copy and paste it from the top of the integration page.)For the header
x-jsm-app-key, input the API key from the JSM API integration you created in step four.
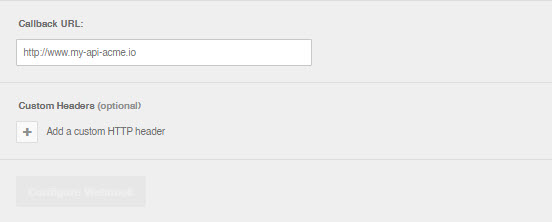
Webhook builder
Configure the integration in Jira Service Management
After configuring the webhook, return to your Jira admin panel and and navigate to Apps > Sites > [Your Site] > Connected Apps > BigPanda (JSM) > … > Get Started. Then, click the Projects tab to finish setting up the integration.
Only compatible with IT Service Management template
The JSM integration will only work with spaces that use the IT Service Management template. If your space does not appear in the JSM ServiceDesk dropdown, it is because that space was created using a different template. At this time, the only solution is to create a new Space using the IT Service Management template.
To configure the integration:
Click Add Project.
Copy the App key from your BigPanda integration.
Use the JSM ServiceDesk dropdown to select which JSM Space you want to use for this integration. This is the Space where incidents will be sent.
Use the JSM Request Type dropdown to choose the request type you want to use for incoming incidents.
In Field Mappings, click Add mapping and set the BP source, BP field, Jira field, and value type for each field to populate. Map priority here as well. There is no limit to the number of mapped fields. Any fields that are not mapped will be dropped.
Edit the Summary Template and Description Template. Keep the summary short, and use caution with tags. Jira will reject a summary over 255 characters.
In the Alerts Table Columns field, add up to 10 tags to appear as columns in the alert table. These columns will appear in the order the fields are listed. Delete individual fields or all fields to remove the alerts table from the issue view.
In the request: Below the request description, for requests created from BigPanda incidents.
In the Alerts view: When you open an alert from Operations, then Alerts.
Configure Max Rows Per Page to adjust the number of alerts listed per page on the alerts table. Default is 10
(Optional) Configure Status Mapping to control which JSM status is applied when a request is created, resolved, or re-opened through the integration. For closed-list fields such as
PriorityorStatus, specific values can be mapped to Jira values. The list of incident and alert tags and Jira fields is populated by available fields in the connected BigPanda organization and Jira project.(Optional) Configure Resolve behavior to synchronize resolution between BigPanda and JSM.
Click Save.
Field mapping
Field mapping sets Jira fields from BigPanda incident data when the integration creates or updates a request. Without a mapping, requests carry only the summary, description, and alerts table.
Field mapping reads incident fields and incident tags. Alert tags are configured separately, in Alerts Table Columns, which sets the columns of the alerts table rather than Jira fields. The two are often called incident mapping and alert mapping.
Map every expected value
A BigPanda value with no mapping leaves the Jira field unset rather than falling back to a default. Map each value your organization uses, including the ones that appear rarely. All unmapped fields will be dropped from the Jira payload on send.
Add field mapping
In the app project add or edit screen, go to Field Mappings.
Click Add mapping.
Set the four row fields.
Repeat for each field, then click Save.
Mapping row fields
Field | Description |
|---|---|
BP source | Where the value comes from. Incident reads an incident field. Tag reads an incident tag. |
BP field | The incident field or incident tag to read. The list is populated from the connected BigPanda organization. |
Jira field | The target field. The list is populated from the fields available on the selected request type. |
Value type | The data type of the value: priority, labels, date, string, assignee, or array. |
Field application timing
Most mapped fields are set when the request is created. Two are applied after the request exists, because Jira does not accept them on the create call:
Request participants
Organizations
Assignee mapping resolves the BigPanda value to a Jira account on the site. If the value does not match an account, the request is created with no assignee.
Priority mapping
Priority is mapped through field mapping rather than a separate screen. Map the BigPanda source that carries priority to the Jira Priority field and set the value type to priority.
For closed-list Jira fields such as Priority and Status, individual BigPanda values map to individual Jira values. Both lists are populated from the connected BigPanda organization and the Jira project, so only values that exist in each system appear.
Status mapping
Status mapping controls which Jira Service Management status the integration applies at each stage of a request's life. Without it, the integration uses the default status for the request type.
Setting | Applied when | Example |
|---|---|---|
Create requests as | A request is created from a BigPanda incident. | Open |
Resolve requests as | The request is resolved through sync from BigPanda. | Done |
Re-open requests as | The request is re-opened through sync from BigPanda. | Reopened |
NOTE: Statuses must exist in your workflow. You can only map to statuses that exist in the JSM project's workflow for the selected request type. If a status you need is missing, add it to the workflow in Jira first, then return to the mapping.
Summary and description templates
The summary and description templates control the text of the request. Both resolve BigPanda incident data through double-bracket variables, the same pattern used for customized Jira issue descriptions.
Write a variable in Handlebars syntax, for example {{primaryAlert.host}}. Variables resolve when the request is created and again each time the incident updates the request. The Summary Template and Description Template use the same syntax.
To discard edits and restore the shipped template, click Revert to default. Reverting affects only the template being edited and takes effect when the configuration is saved.
Variable | Resolves to |
|---|---|
| The value of the tag named by the primary property, for example the host value when primary property is host. |
| The value of the tag named by the secondary property. |
| The value of a named tag on the primary alert, for example {{primaryAlert.check}}. |
| The BigPanda landing page URL for the incident. |
Use short-length tags.
Keep the summary short. Jira will reject a summary over 255 characters.
Resolve behavior
The integration can synchronize resolution in both directions between BigPanda and Jira Service Management. Both directions are configured independently, so you can enable one, both, or neither.
Resolve the BigPanda incident when the JSM request is closed: Closing the request in JSM resolves the linked incident in BigPanda.
Close the JSM request when the BigPanda incident is resolved: Resolving the incident in BigPanda closes the linked request in JSM.
NOTE: Enabling both directions. With both toggles enabled, resolution in either system propagates to the other. This is the usual configuration for teams who work incidents from both tools. If your team resolves only in JSM, enabling just the first toggle avoids surprising changes to JSM requests.
Resolve behavior applies only to requests the integration created. Requests created manually in JSM are not affected.
Request link
When the integration creates a Jira Service Management request, it sends the request URL back to the linked BigPanda incident. Responders working in BigPanda can open the JSM request directly without searching for it.
The link uses your Atlassian site address, for example:
https://<your-site>.atlassian.net/browse/<ISSUE-KEY>
Troubleshooting
Symptom | Likely Cause | Solution |
|---|---|---|
A request is created with the wrong status. | Status mapping is not configured, so the request type's default status is used. | Configure status mapping for the integration. |
A status you need is missing from the mapping dropdown. | The status does not exist in the project's workflow for that request type. | Add the status to the workflow in Jira, then set the mapping. |
Closing a request in JSM does not resolve the BigPanda incident. | Resolve behavior is not enabled for that direction, or the request was not created by the integration. | Enable the corresponding resolve toggle. Requests created manually in JSM are not linked to an incident. |
Resolving an incident in BigPanda does not close the JSM request. | The opposite resolve direction is not enabled. | Both directions are configured independently. Enable the second toggle. |
The alerts table is not shown. | No columns are configured, which removes the table. | Add at least one field to Alerts Table Columns. |
Space does not appear in the ServiceDesk dropdown. | The Space was not created from the IT Service Management template. | Create a new space following the instructions above. |
Request not created from a shared incident. | The webhook setting or the integration is not turned on. | Confirm the integration is Active in the BigPanda console. |
Mapped assignee not set. | The value does not resolve to a Jira account on the site. | Remap the assignee to a Jira account. |
A mapped field is empty on the created request. | The BP field or tag has no value on the incident, or the value type does not match the Jira field. | Confirm the tag has a value at share time, then check the value type on the mapping row. |
A mapped priority or status is empty for some incidents only. | The specific BigPanda value has no mapping to a Jira value. | Add a value mapping for each BigPanda value in use, not only the common ones. |
A template variable appears as literal text in the request. | The variable name does not match a tag or field on the incident. | Correct the variable name to match the incident tag or field exactly. |
The app does not install. | The Atlassian account lacks Admin permissions on the site. | Install as a site or organization administrator. |
Requests are created but carry no incident context. | The sending organization is in a different BigPanda region than the one selected in the app. | Confirm the usage region in the app configuration matches the BigPanda instance. |