Manage Biggy Access Controls
The Access Controls section of the Biggy Web App provides a single place for administrators to manage who can access your organization's data in Biggy. You can create and manage users, control which tasks they can perform, and which areas of the web app they have access to.
Key Features
Create and manage Biggy users.
Determine which action plans users are able to execute.
Restrict which areas of the Biggy web app users can view or edit.
Determine which data sources Biggy can use to retrieve answers for specific users.
Customize standard Biggy roles and create custom roles.
Roles
Within the Roles page, you can configure roles to control permissions for your organization. Roles allow you to restrict what source data users can access, which parts of the web app they can use, and what action plans they can execute.
Two standard roles are included, but you can also create custom roles to fit your organization's needs.

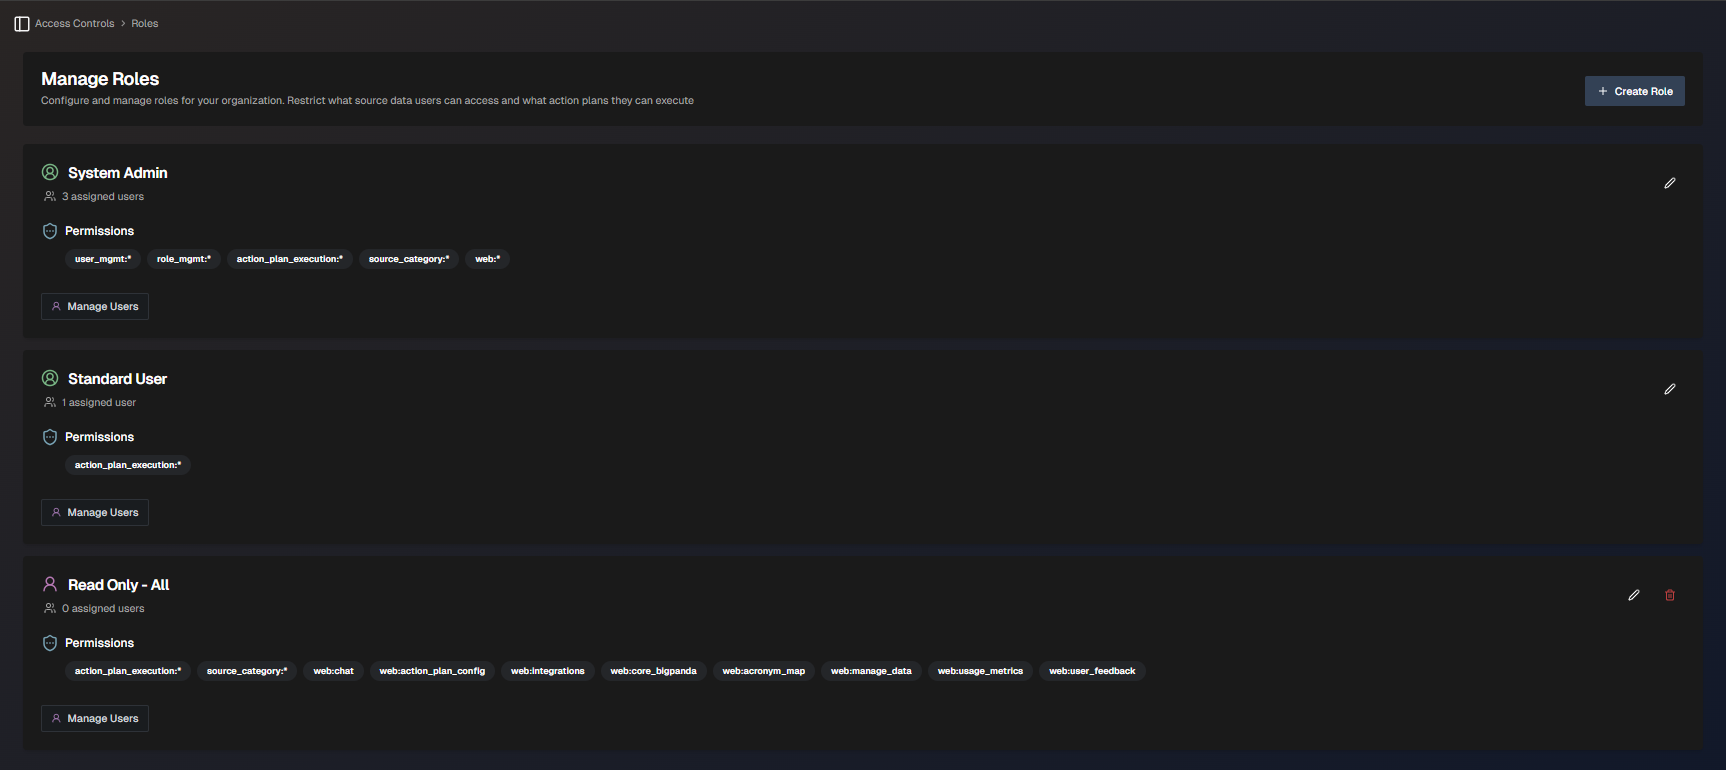
The Roles Page
Standard Roles
Biggy offers two standard roles:
System Admin - Allowed to execute any action plan, and edit all sections of the web app. This role cannot be edited.
Standard User - Able to execute all action plans. If a user is not assigned a role upon creation, they will receive this role by default. This role can be edited.
Role icons
Standard roles have a green icon next to the name. Custom roles have a purple icon.
System Admin
Permission name | Resource Name | Access Level |
|---|---|---|
Action Plan Execution | All | Execute |
Data Access | All | View |
Role Management | All | Edit |
Source Category | All | View |
User Management | All | Edit |
Web App | All | View, Edit |
Standard User
Permission Name | Resource Name | Access Level |
|---|---|---|
Action Plan Execution | All | Execute |
Data Access | All | View |
Web app access
Standard Users are able to log in to the web app, but can only view the Dashboards and Guides and Resources sections.
Create a Role
Custom roles have access to specific sections and actions within Biggy.
To create a new role:
Within the web app, navigate to Access Controls > Roles.
Select + Create Role.
Enter a descriptive Role Name.
In the Permissions section, select a Resource Type from the drop-down menu. See Resources for more information about the resource types available.
Select a Resource Name from the drop-down menu. To provide access to all of the available resources, select All.
Under Actions, specific actions are enabled by default. Click an action name to disable it if necessary.
Disabling actions
If a resource only has one action type available, and that action is disabled, you cannot add the permission to roles.
Click Add Permission to add it to the role. It then appears in the Enabled Permissions section on the right side of the pane.
(Optional) Repeat steps 4-7 to add additional permissions to the role.
Click Create Role to save the role.
Manage enabled permissions
Click the Delete icon on the permission name to remove it from the list.
If there are a large number of permissions for a role, use the search bar to filter the enabled permissions list to find what you need.
Resources
The following resource types are available for building roles for Biggy:
Resource Type | Description | Actions |
|---|---|---|
Action Plan Execution | Determines which action plans Biggy is able to execute for a user. In the Resource Name selection, you can choose from the action plans your organization has enabled or select All. | Execute |
Data Access | Determines which indexed data Biggy is able to use to answer questions or perform tasks for a user. In the Resource Name selection, you can choose from the data sources your organization has enabled or select All. | View |
User Management | Provides access to the Users page in the web app. | Edit |
Role Management | Provides access to the Roles page in the web app. | Edit |
Biggy Web | Determines which areas of the web app a user is able to view or edit. In the Resource Name selection, you can choose from the specific sections of the web app or select All. | View, Edit |
Add a Permissions Message
You can add a custom permissions message that appears when a user attempts to perform an operation, but doesn't have the correct role.
For example, you can add a message letting users know who to contact to request the correct permission.
To add a permissions message from the Roles screen, click Settings. The Permissions Message window opens, where you can add a custom message.
Standard notification
Each permission message automatically begins with the standard permission denied notification.
For example, if you configure the custom message to say:
"To request access, please open a DTM ticket and specify BiggyAccess as the subject"
The final message will be:
"You do not have the necessary permissions to perform this operation. To request access, please open a DTM ticket and specify BiggyAccess as the subject"
Manage Users in Roles
Adding a user to a role provides them with access to all of the resources configured in the role. Users can be added or removed to a role from within the Roles screen.
To add a user to a role, navigate to the role that you would like to assign to a user and click Manage Users.
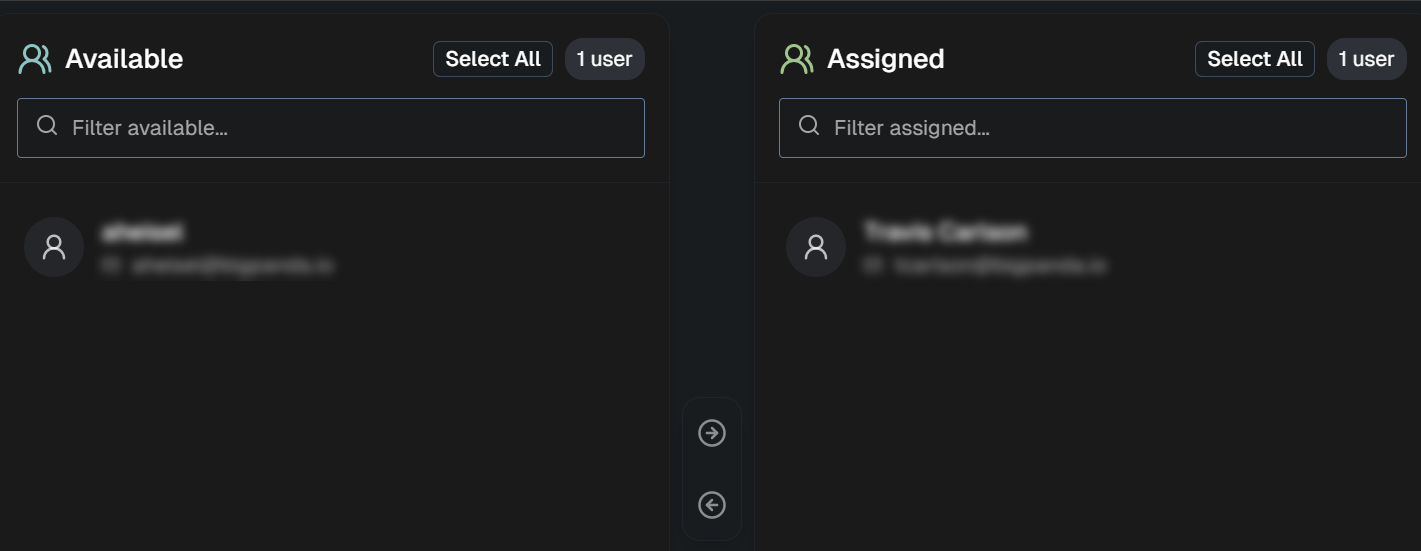
Users who have not been assigned a role appear on the left side in the Available section, while users who have been assigned a role appear on the right side in the Assigned section.

Manage Users screen
To assign a user to a role, select their name from the Available section. You can select multiple users at a time, or click Select All to select all of the users in the list. To find a specific user, type a name or email address into the Filter available box. Click the right arrow to move the user(s) to the Assigned section.
To unassign a user from a role, select them from the Assigned section and click the left arrow to move them to the Available section.
Click Save Changes to apply the role changes.
Edit or Delete a Role
To edit a role, click the pencil icon.
To delete a role, click the trash can icon. The deleted role will be unassigned from all users and cannot be retrieved.
Default roles
Default roles can be edited, but not deleted.
Users
The Users page allows administrators to manage the roles associated with Biggy users, and add new users to the system. You can create or delete users, view account information, and assign or remove roles.
New users
When a user interacts with Biggy in Slack or MS Teams, they are automatically added as a user with the Standard User role.

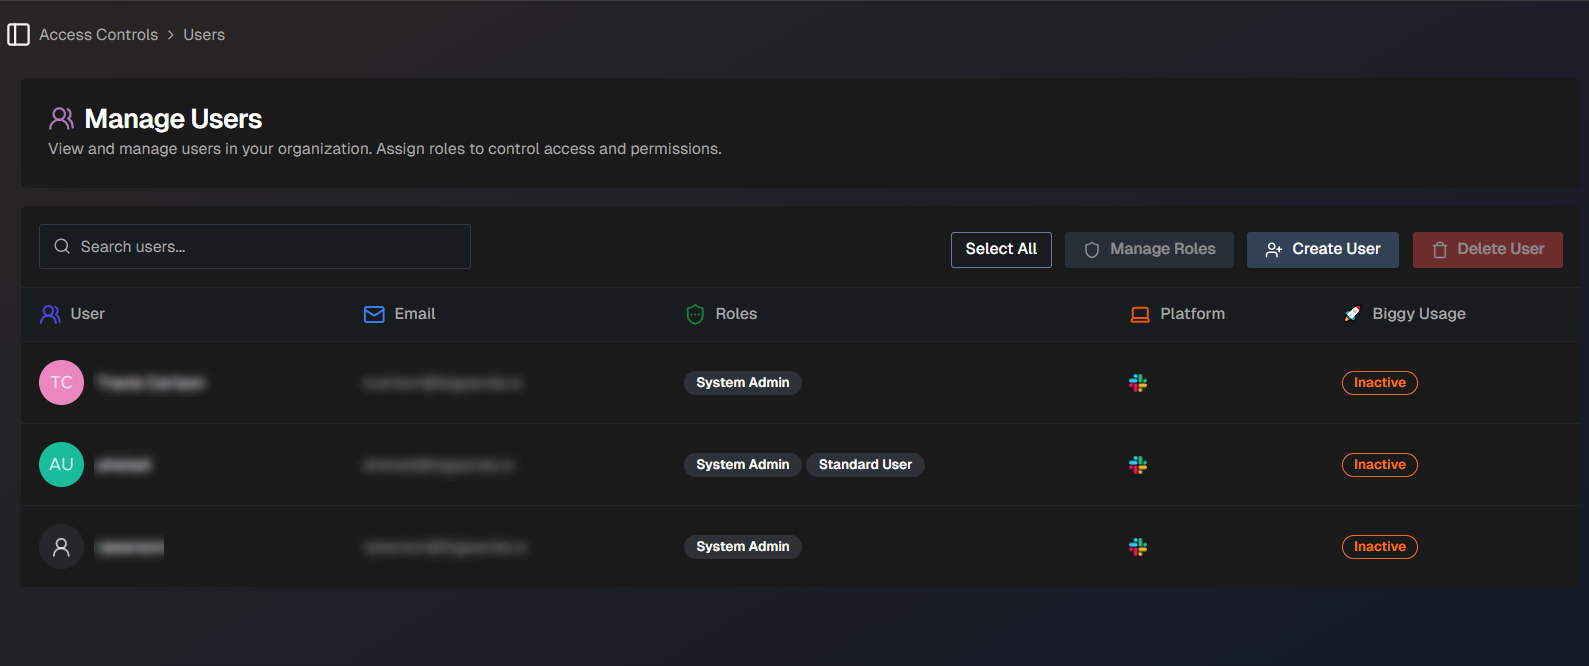
The Users Page
Create a User
To create a new user:
In the Users page, select the Create User button.
Enter the user email associated with the user's Slack or MS Teams account. The user must already be part of your Slack or MS Teams workspace.
Select a role from the list to assign to the user.
Select Create User to save.
Manage Roles
You can apply or remove roles from an account on the Users page.
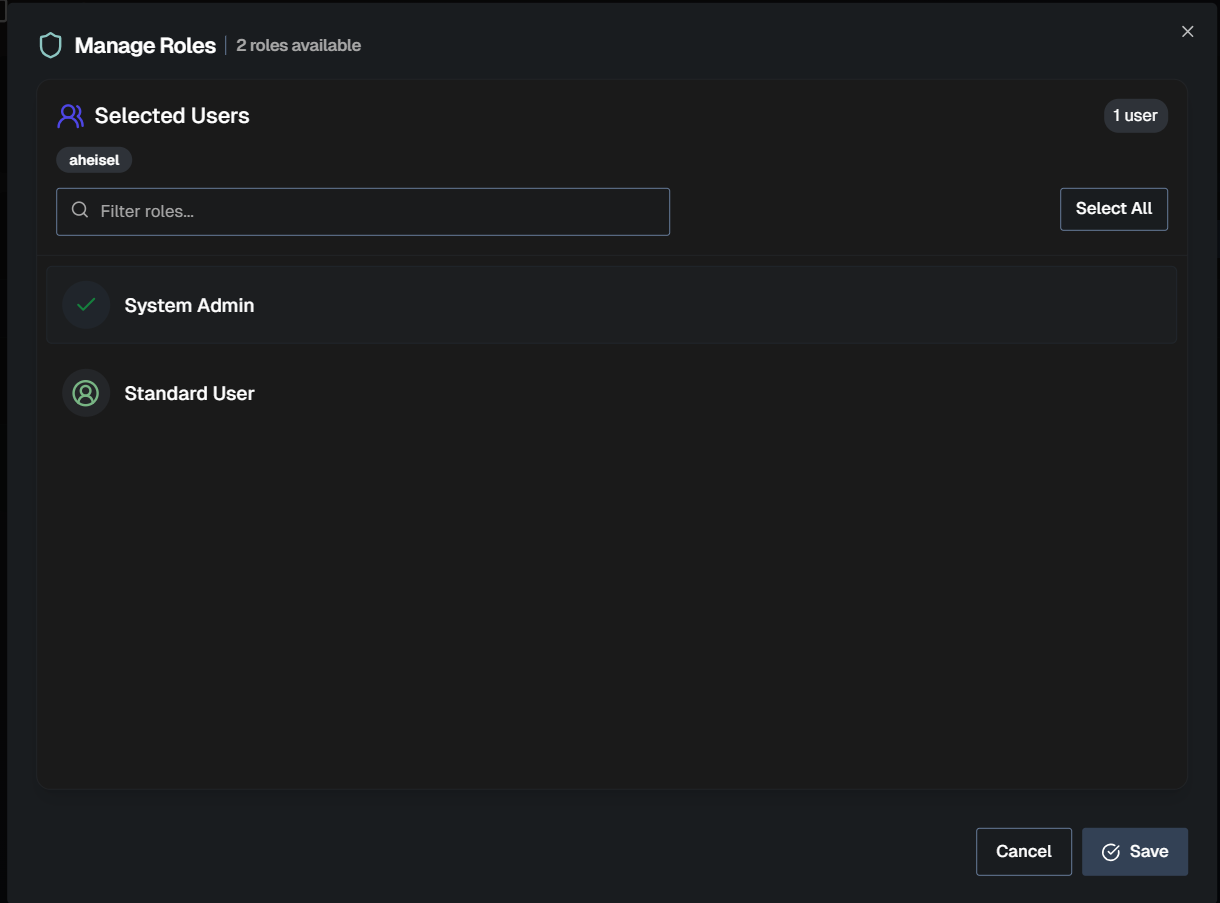
Select one or more users from the list and select Manage Roles.
On the Manage Roles screen, you can select or deselect roles from the list.

Manage Roles
Manage Users
On the Users page, you can view basic information about each account such as:
Name
Email address
Roles
Team
Chat platform used
Whether they completed Guided Onboarding
Account status
Use the Search users box to filter the list to find a specific user.
Click one or more users in the list to take action on their accounts. Alternatively, click the Select all option to select all users in the list.
Select Manage Roles to assign or remove roles from the selected users.
Select Delete User to remove the user from the system.
Assign a Team
You can assign a user to a team from the Users page.
Manage Teams
Teams are used to track usage for specific groups of users. New teams can be created from the General Settings page.
To add a user to a team:
Find the user in the list that you'd like to assign to a team.
Go to the Team column and click the Edit button.
In the Edit Team Assignment window, select a Team from the drop-down menu.
Click Save.
Team membership
A user can only be a member of one team at a time. If a user moves from one team to another, all of their usage metrics will be attributed to their new team.
Next Steps
Explore the Biggy Web App.
Learn how to Manage Incidents with Biggy.
Find valuable insights using Biggy Analytics.