Report Templates (IA)
Report Templates let you design reusable, branded layouts for Biggy-generated reports. Set the theme, logo, confidentiality banner, and section layout once, and use the template for PDF, DOCX, or CSV exports.
On the Report Templates page, you can:
Design a template and preview the rendered document side by side.
Build the document from ordered sections so PDF and DOCX files follow the same structure.
Manage a shared library of logos and images that templates reference.
Manage report templates in the web app at Manage > AI Capabilities > Report Templates.
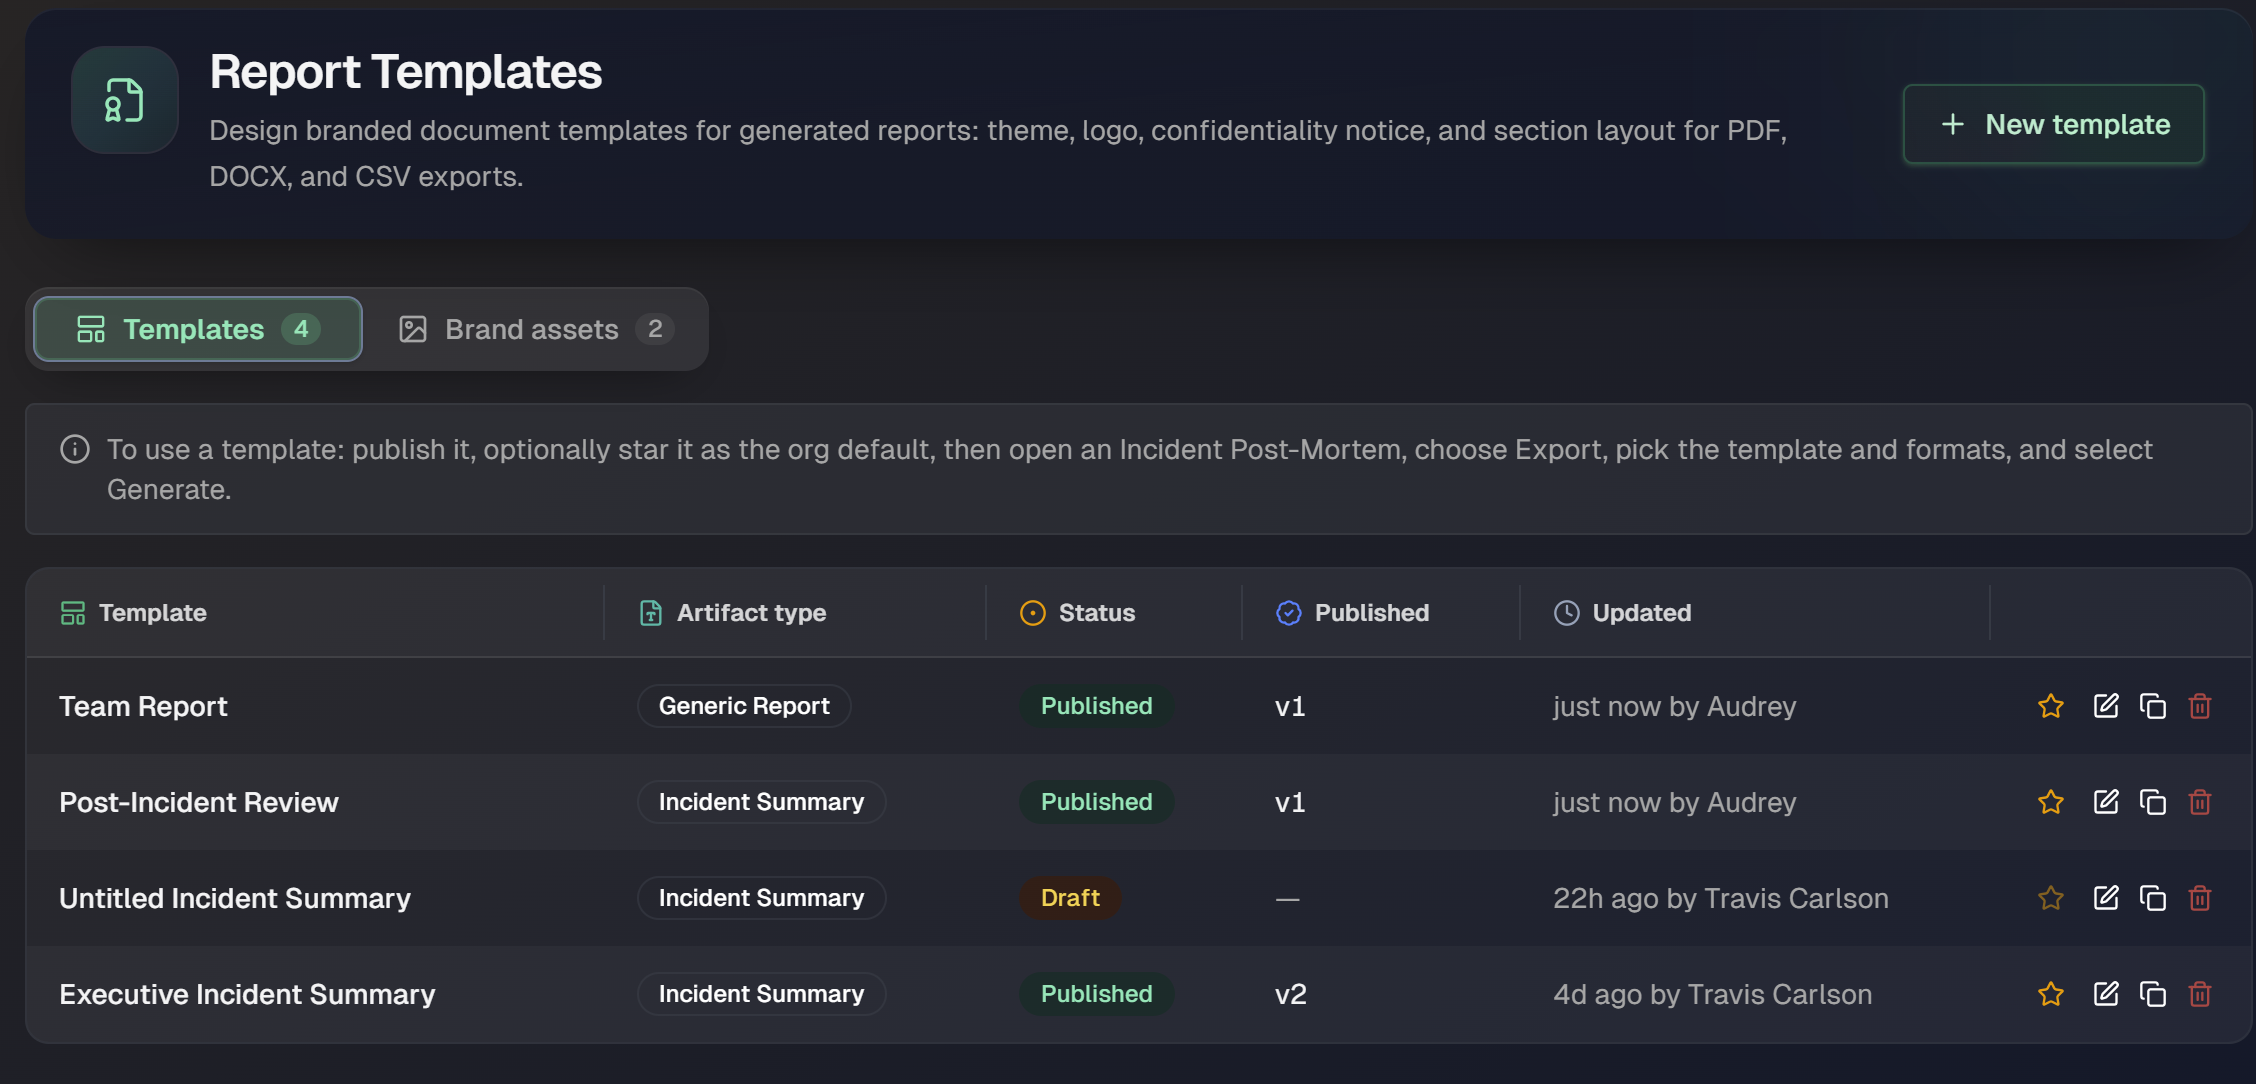
View your templates
The Templates tab lists every report template in your organization. Each row lists a template and it's details:
Artifact type: The kind of report the template applies to, for example Incident Summary or Generic Report.
Status: Either Draft or Published.
Published: The published version number, or a dash when the template has never been published.
Updated: When the template was last changed, and by whom.
At the end of each row, you can star a published template as the default for its artifact type, edit the template, duplicate it, or delete it.
Create a template
Open the Templates tab.
On the right-hand side of the page, click New template.
In the New report template dialog, choose a starting point:
Starter blueprints: Ready-made Incident Summary layouts, including Executive Incident Summary, Post-Incident Review, Stakeholder Incident Notice, Problem Management Report, Incident Timeline Report, and Compliance Incident Record.
Start from scratch: Blank Incident Summary or Blank Generic Report, which opens an empty canvas for you to add your own sections, fields, and branding.
Select a blueprint or a blank option to open the template editor.
After the template opens, you can rename it, swap in your logo, adjust the theme, or reorder sections before publishing.
Design the template
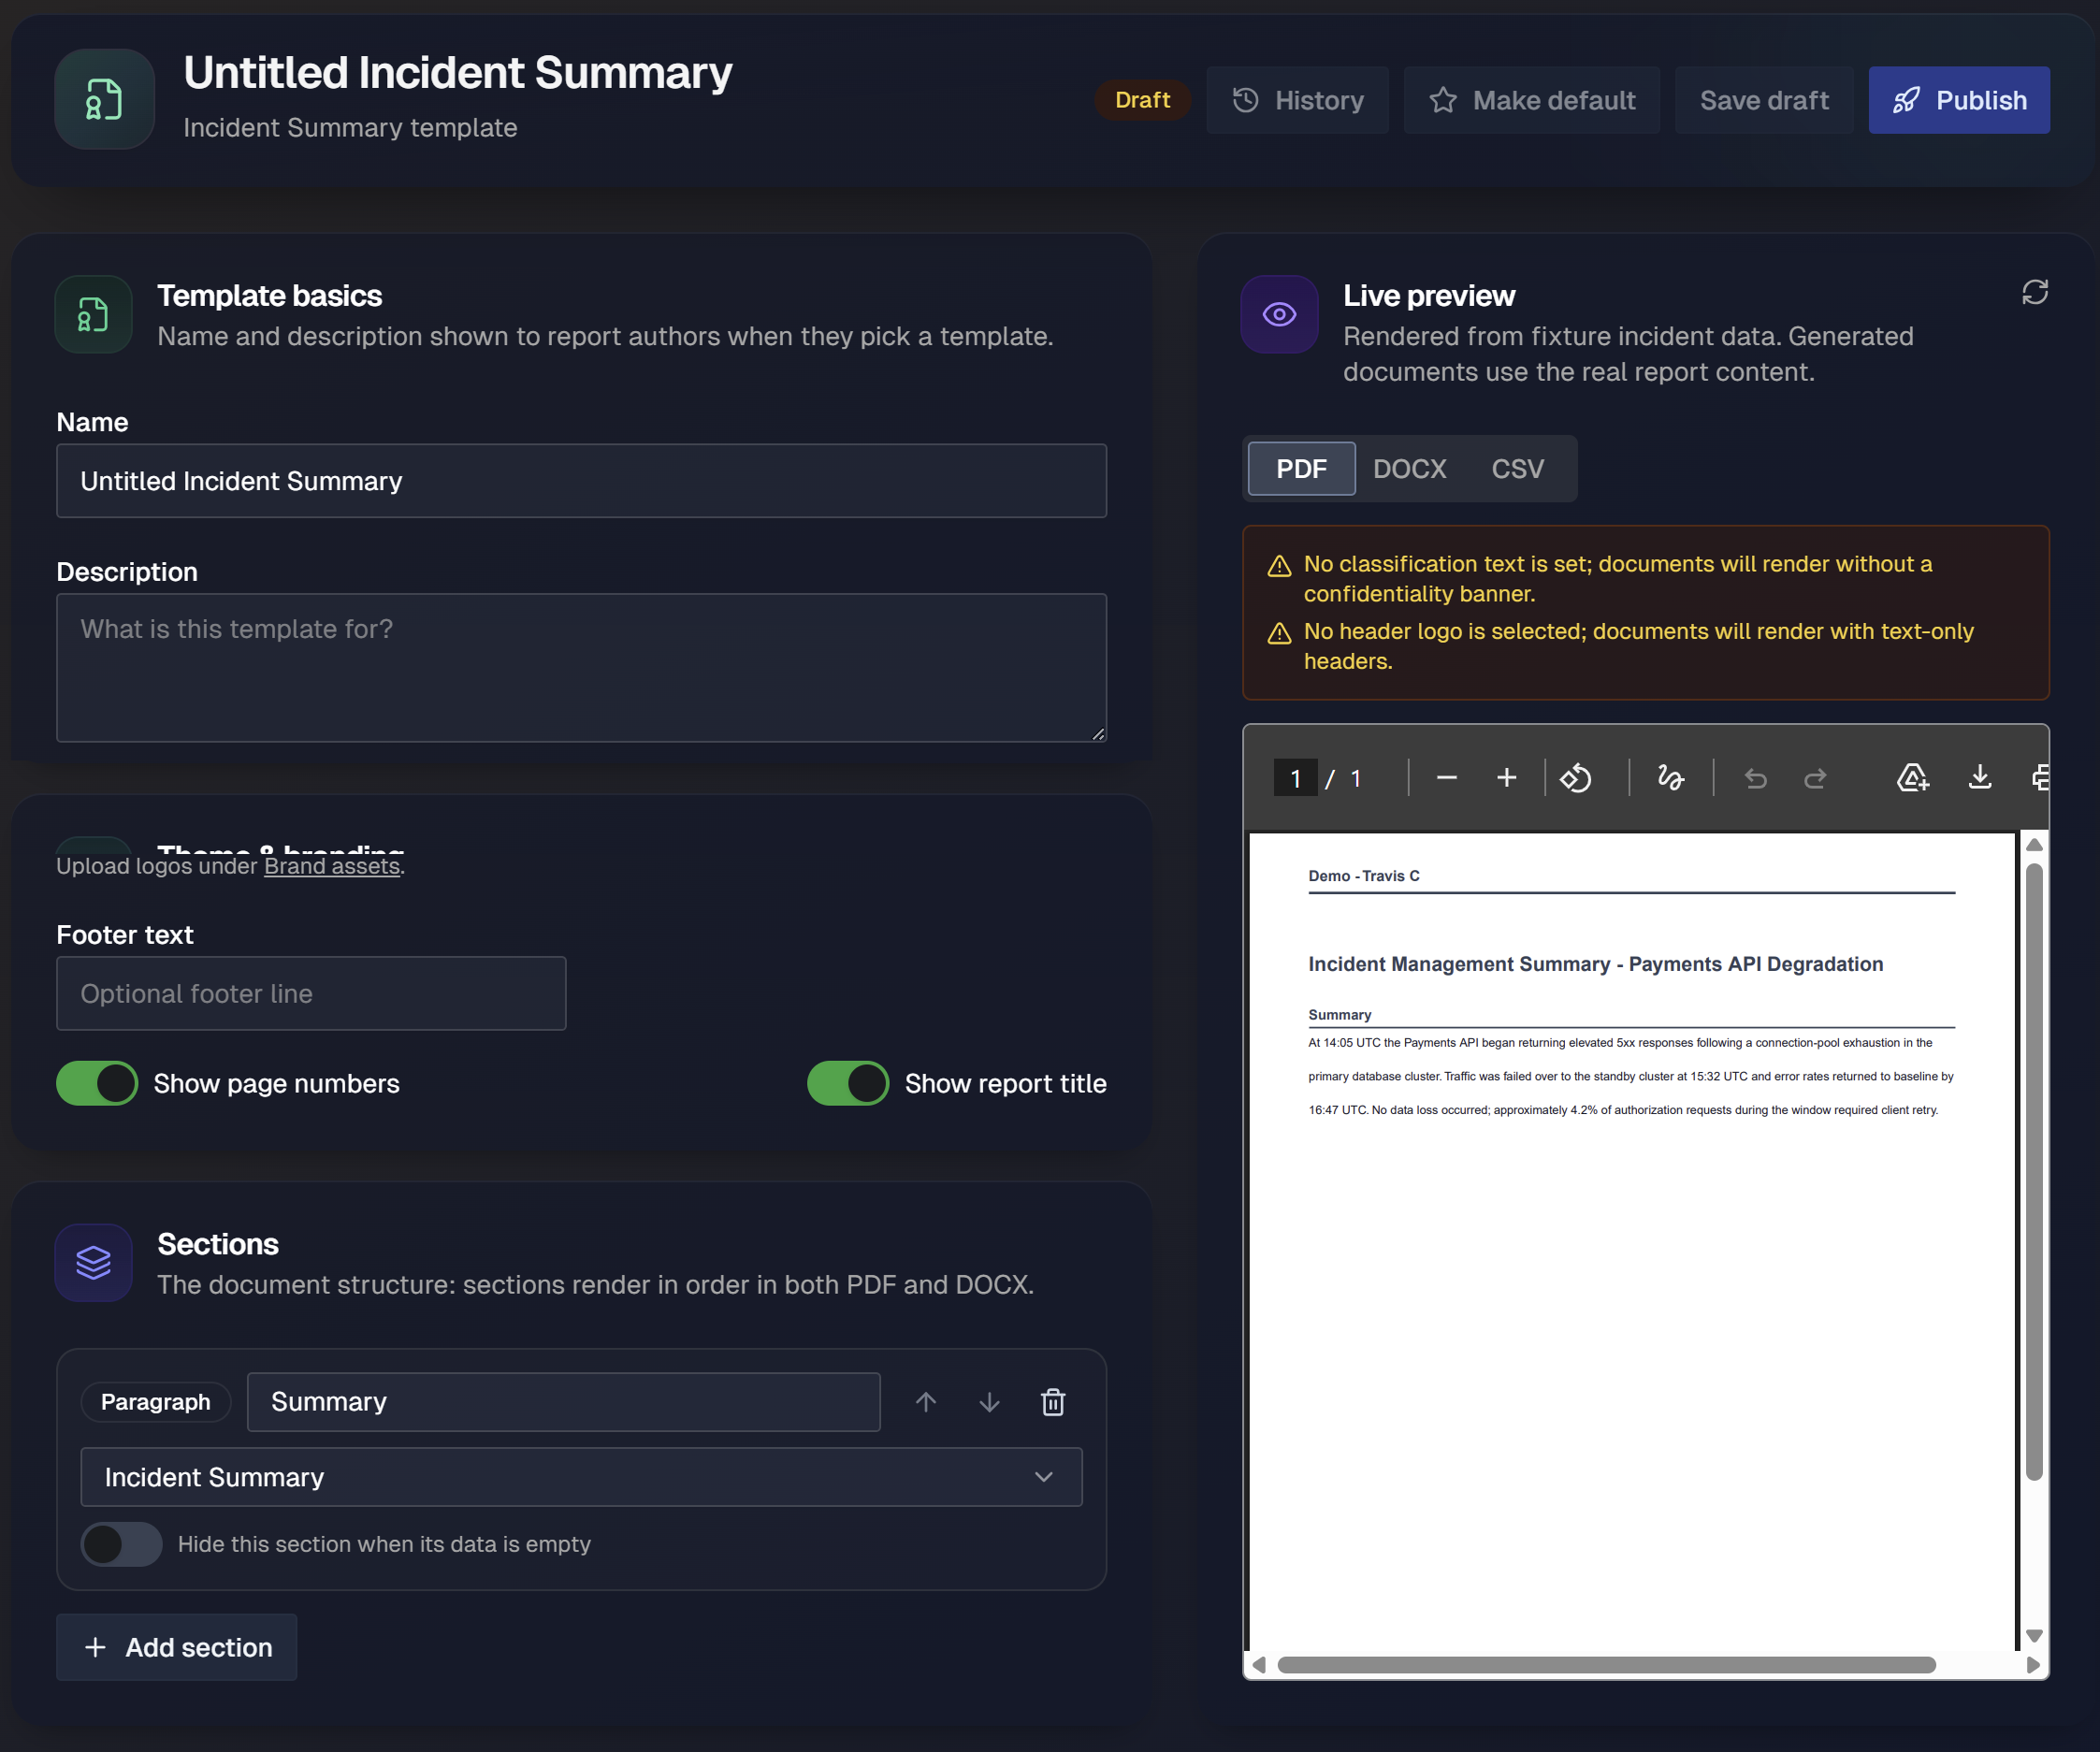
The template editor has template settings and branding controls on the left and a live preview on the right.
The preview shows how the report will look as you make changes. It uses fixture incident data in the editor, while generated documents use the report's actual content.
Set template basics and branding
In the Template basics section, set the Name and Description report authors will see when picking a template.
In the Theme & branding section, define the document's visual elements:
Primary color: The primary text color used in the report.
Font family: The font used in the report.
Page size: The page dimensions for the document, for example
US Letter.Classification banner: The confidentiality text that renders on every page, for example
Confidential - Not for External Use. When no text is set, documents render without a confidentiality banner.Header logo: The logo shown in the document header. Select
No logo (organization name text)to render text-only headers, or choose an uploaded logo. Logos are uploaded under Brand assets.Header tagline: (Optional) Line of company text shown in the header.
Footer text: (Optional) Footer line.
Use the Show page numbers and Show report title toggles to control whether those elements appear in the document.
Build the document
In the Sections area, define the document structure. Sections render in order in both PDF and DOCX.
Click + Section to add a new section. Available section types include:
Field grid
Paragraph
Key/value table
Data table
Bullet list
Page break
For each section, define the Section title and Payload field.
Enable the Hide this section when its data is empty toggle to hide the section if there is no content.
To reorder a section, use the up and down arrows. To remove a section, click the delete icon.
Preview the export
In the Live preview panel, switch between the PDF, DOCX, and CSV tabs to see how the document renders in each format. The panel surfaces warnings when a setting will affect the output, for example when no classification text is set or no header logo is selected.
CSV carries data, not branding
CSV is a structured data export and does not preserve visual branding or images. Use PDF for distribution, DOCX for editing, and CSV for raw data.
Publish and set a default
The editor toolbar shows the current template publication status and the publishing controls.
Click Save draft to keep your work as a draft. A draft is not available for export.
Click Publish to release a versioned copy of the template. Each time you click publish, it creates a new version.
To make a template the organization default for its artifact type, click Make default in the editor, or click the star on the template's row. Only one template can be the default for each artifact type.
To review earlier versions, click History.
Manage brand assets
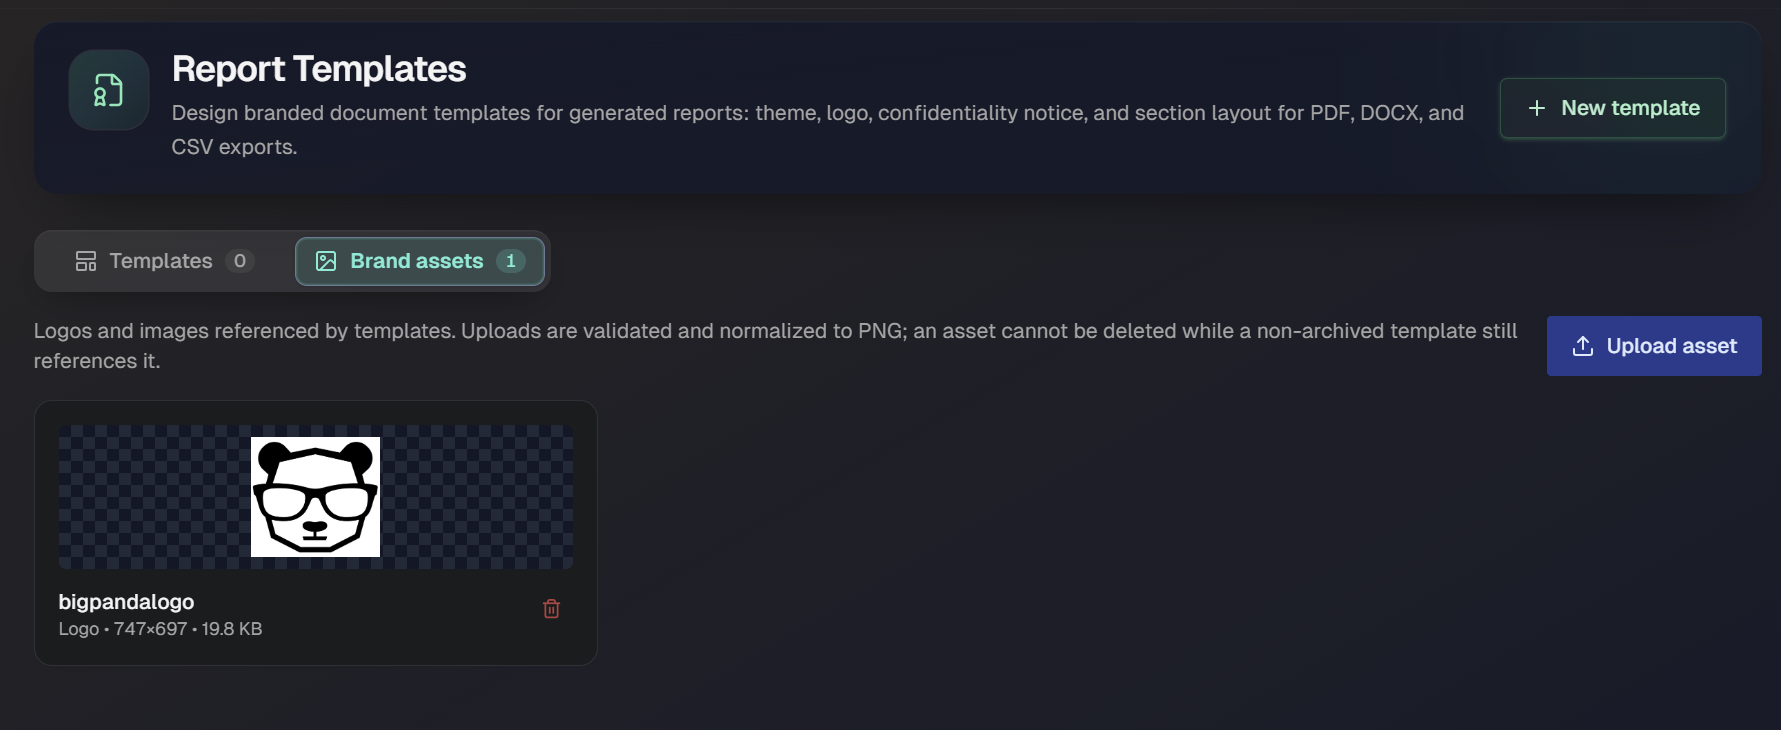
Brand assets are the logos and images that templates reference. They live in a shared, reusable library so you can use them across templates.
Open the Brand assets tab.
On the right-hand side of the page, click Upload asset.
In the Upload brand asset dialog, enter a Name and choose a Kind, for example
Logo.Click Upload.
Uploads are validated, normalized to PNG, and stored privately for your organization. Each asset card shows the asset name, kind, dimensions, and file size.
Assets in use cannot be deleted
An asset cannot be deleted while a non-archived template still references it. Remove the reference from the template or archive it before deleting the asset.
Generate a branded export from a post-mortem
Once a template is published, you use it to generate a branded export from an incident post-mortem.
In the web app, go to Operate > Incidents > Incident Post-Mortems.
Open an Incident Post-Mortem.
Choose Export.
In the branded exports dialog, pick the Template and select the Formats you want: PDF, DOCX, CSV, or a combination.
Click Generate.
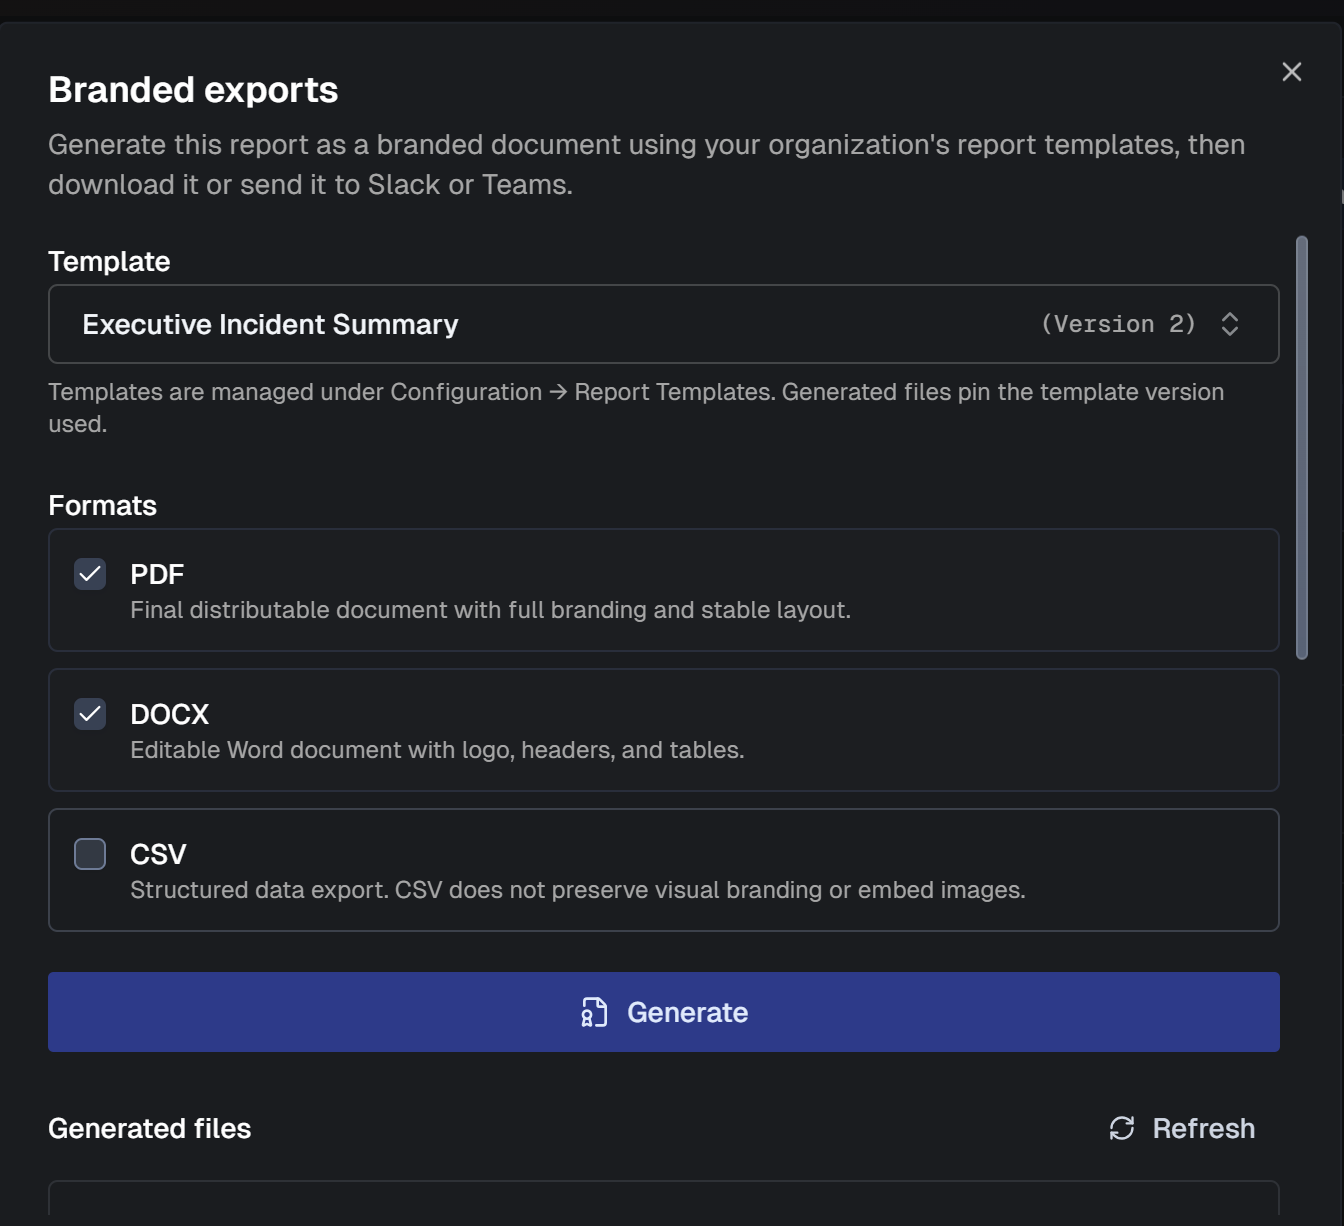
The finished files are ready to download, or to send straight to Slack or Teams.