Published Reports
Generate, share, and revisit interactive reports with the Published Reports page in the Biggy web app.
Access this page at Operate > Reports > Published Reports.
Describe the report you want, add your source content, and Biggy plans, designs, and builds a polished, shareable report in minutes. Use Published Reports to turn raw data, logs, and analysis into incident reviews, usage guides, dashboards, and long-form documents that you can share with your team or organization.
Key features
Generate a structured, interactive report from pasted text, logs, or uploaded files.
Choose a report layout, or let Biggy select the best structure for your content.
Watch the report build in a live preview as each section is written.
Refine a finished report or regenerate it from the original source content.
Control report visibility by keeping it private, sharing it with specific people, or making it available across your organization. Recipients always get a read-only view.
Track report versions and revisit the source inputs a report was generated from.
View published reports
In the navigation pane, expand Reports and select Published Reports.
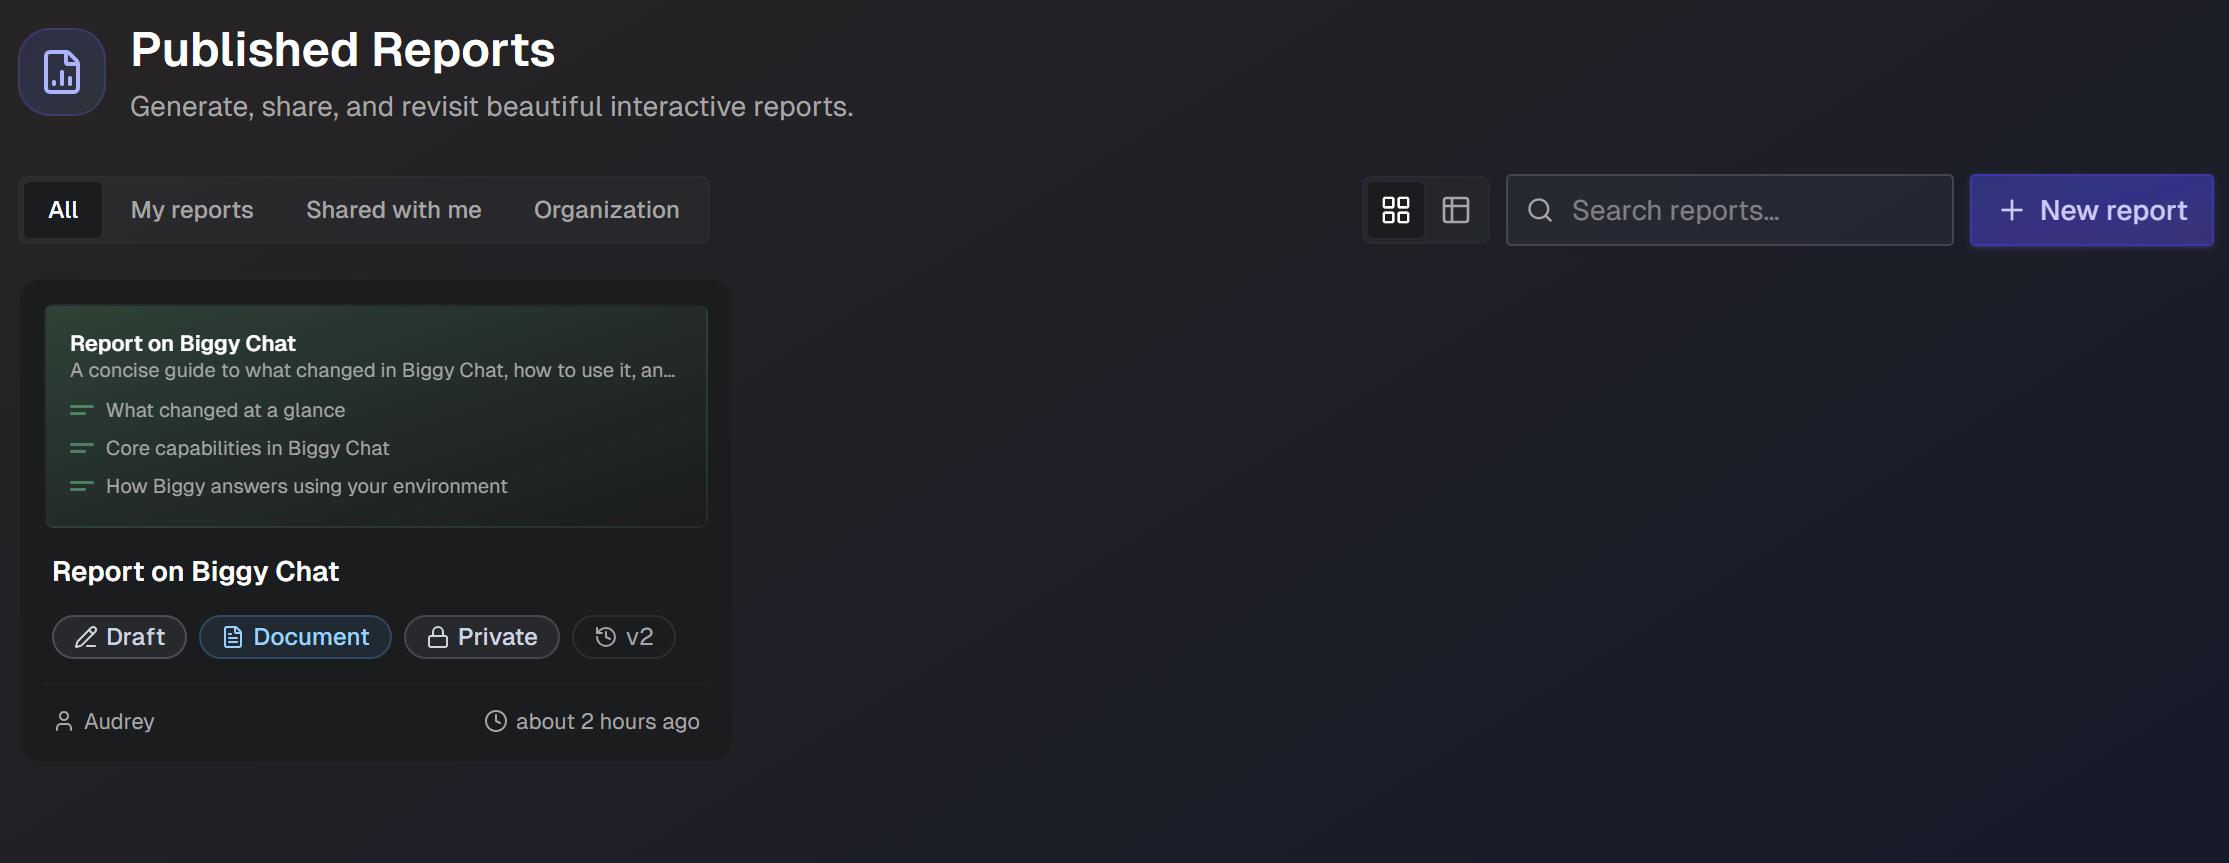
The Published Reports page displays every report you have access to. Each report card shows the report title, a short description, a preview of the report sections, and status badges for the publication state, the publication type (for example, Document), and the sharing level. The card also shows the report creator and when the report was last updated.
Use the controls at the top of the page to find and organize reports:
Filter tabs: Switch between All, My reports, Shared with me, and Organization to narrow the list of visible reports.
View toggle: Switch between grid view and table view.
Search reports: Search the report library by keyword.
New report: Open the Create Report page to generate a new report.
If your team has not created any reports yet, the page displays an empty state. Click Create your first report to get started.
Create a report
In the upper right corner of the Published Reports page, click New report. The Create Report page opens.
In the Report title field, enter a name for the report. For example,
Q3 Incident Review.In the What should this report cover? field, describe the report you want. Biggy uses this description to plan the structure and design of the report. The description can be up to 4,000 characters.
Under Layout, select the report structure:
Auto: Let Biggy choose the best layout for your content.
Dashboard: A metrics-forward layout with KPIs, tables, and charts.
Analysis: An investigation layout focused on findings and evidence.
Document: A structured, long-form narrative.
Under Source content, add the material Biggy should build the report from. You can combine multiple sources:
Paste text: Paste text, logs, or data into the text field, then click Add.
Upload a file: Drag a file into the drop zone, or click browse to select a file. Supported formats are CSV, JSON, TXT, and Markdown, up to 2 MB per file.
The source counter above the list shows the total number of sources and characters added. To remove a source, click the X icon next to it.
When the status at the bottom of the page shows Ready to generate, click Generate report.
Be specific
The quality of the generated report depends on the quality of your description. Include the audience, the key questions the report should answer, and any sections you expect. Specific descriptions produce more useful reports than vague ones.
Monitor report generation
After you click Generate report, the generation panel and a live preview open. Reports usually take a couple of minutes to generate.
Biggy builds the report in five stages:
Stage | Description |
|---|---|
Planning | Defining the report structure and sections. |
Designing | Laying out the report shell. |
Building | Writing each section. |
Reviewing | Polishing and fact-checking the content. |
Finalizing | Sealing the report. |
While the report generates, you can:
Track overall progress with the section counter and progress bar.
Follow the Activity feed to see what Biggy is working on.
Watch each section appear in the Sections list and in the live preview.
Click Stop to cancel generation.
If generation fails, the panel displays a Generation failed message. Click Try again to restart generation with the same inputs.
Manage a report
Select a report from the Published Reports page to open it. The report page displays the report content along with its status badges, version number, creator, last updated time, and file size.
Use the controls at the top of the report page:
New version: Create a new version of the report.
Share: Open the Share report window.
Click the ... menu for additional actions:
Full screen: Expand the report to full screen.
Open raw: Open the raw report output.
Regenerate from source: Rebuild the report from its original source content.
View source: Open the Report source window, which displays the inputs the report was generated from, including the original instruction, pasted text, and uploaded files.
Edit details: Update the report details.
Delete: Permanently delete the report.
Revisit your inputs
Use View source before regenerating a report. Reviewing the original instruction and source content helps you decide whether to regenerate as-is or create a new report with improved inputs.