Nagios XI
Supported Versions | Type | Authentication Type |
|---|---|---|
4, 5 | Agent | Bearer Token |
Nagios XI provides a central view of your entire IT operations network and business processes. Use the BigPanda Agent to connect to Nagios XI, and begin sending alerts directly to BigPanda.
Install the Integration
Administrators can install the integration by following the instructions to install for your chosen agent tool:
For Nagios XI and Nagios Logs - Do not follow the standard configuration step, but follow the XI and Logs specific configuration.
Configure Nagios XI
Follow these steps instead of the in-app configuration instructions for Nagios.
Create BigPanda Notification Commands
In the Nagios XI console, go to Configure > Core Config Manager from the top menu.
Go to Commands > _ Commands from the side menu.
Select the Add New button.
In the Command Name field, enter
notify-host-by-bigpanda.In the Command Line field, enter:
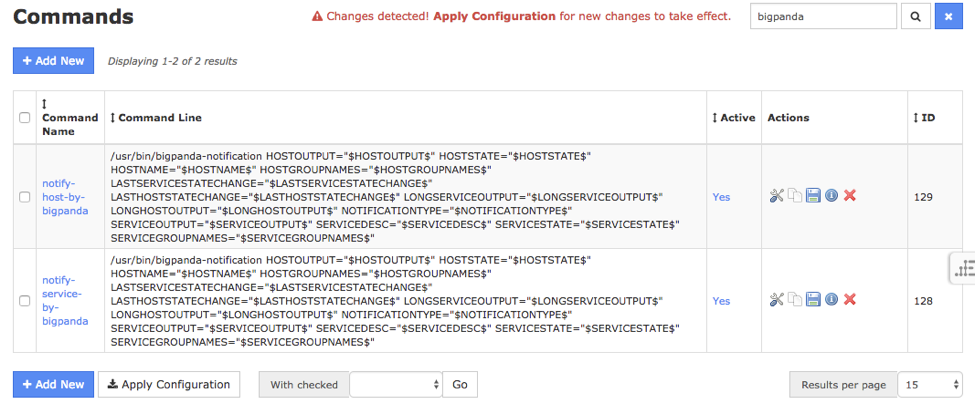
/usr/bin/bigpanda-notification HOSTOUTPUT="$HOSTOUTPUT$" HOSTSTATE="$HOSTSTATE$" HOSTNAME="$HOSTNAME$" HOSTGROUPNAMES="$HOSTGROUPNAMES$" LASTSERVICESTATECHANGE="$LASTSERVICECHECK$" LASTHOSTSTATECHANGE="$LASTHOSTCHECK$" LONGSERVICEOUTPUT="$LONGSERVICEOUTPUT$" LONGHOSTOUTPUT="$LONGHOSTOUTPUT$" NOTIFICATIONTYPE="$NOTIFICATIONTYPE$" SERVICEOUTPUT="$SERVICEOUTPUT$" SERVICEDESC="$SERVICEDESC$" SERVICESTATE="$SERVICESTATE$" SERVICEGROUPNAMES="$SERVICEGROUPNAMES$"
In the Command Type dropdown, select
misc command.Select Save.
Create a second, new command
Select the Add New button.
In the Command Name field, enter
notify-service-by-bigpanda.In the Command Line field, enter:
/usr/bin/bigpanda-notification HOSTOUTPUT="$HOSTOUTPUT$" HOSTSTATE="$HOSTSTATE$" HOSTNAME="$HOSTNAME$" HOSTGROUPNAMES="$HOSTGROUPNAMES$" LASTSERVICESTATECHANGE="$LASTSERVICESTATECHANGE$" LASTHOSTSTATECHANGE="$LASTHOSTSTATECHANGE$" LONGSERVICEOUTPUT="$LONGSERVICEOUTPUT$" LONGHOSTOUTPUT="$LONGHOSTOUTPUT$" NOTIFICATIONTYPE="$NOTIFICATIONTYPE$" SERVICEOUTPUT="$SERVICEOUTPUT$" SERVICEDESC="$SERVICEDESC$" SERVICESTATE="$SERVICESTATE$" SERVICEGROUPNAMES="$SERVICEGROUPNAMES$"
In the Command Type dropdown, select
misc command.Select Save.
Apply the configuration
After creating the two commands, select the Apply Configuration button on the Commands page.
 |
Create a BigPanda Group and Contact
Create a BigPanda Group.
While still under the Core Config Manager page, go to Alerting > Contact Groups from the side menu.
Select the Add New button.
In the Contact Group Name field, enter bigpanda.
In the Description field, enter Send Alerts to BigPanda.
Click Save.
After creating the Contact Group, select Apply Configuration.
Create a BigPanda Contact
From the side menu, go to Alerting > Contacts.
Select the Add New button.
In the Contact Name field, enter
bigpanda.Optionally, in the Description field, enter a description like
Contact for BigPanda.Select Manage Contact Groups.
Add the
bigpandacontact to the Assigned list.Select the Alert Settings tab at the top.
Set Host Notifications Enabled to On.
Set Host Notifications Timeperiod to 24x7.
Set Host Notifications options to Down, Unreachable, Up, Flapping, and Scheduled Downtime.
Set Service Notifications Enabled to On.
Set Service Notifications Timeperiod to 24x7.
Set Service Notification options to Warning, Unknown, Critical, Flapping, Scheduled Downtime, and Ok.
Select the Manage Host Notifcation Commands button.
Add
notify-host-by-bigpandato the Assigned list.Select the Manage Service Notification Commands button.
Add
notify-service-by-bigpandato the Assigned list.Set Can Submit Commands to On.
Click Save.
After creating the Contact, select Apply Configuration.
Add BigPanda Contact Group to Template
Next, add BigPanda Contact Group to Template.
Host Template assignment
Go to Templates > Host Templates from the side menu.
Search for the
generic-hosttemplate.Select the
generic-hosttemplate from the search result list.Select the Alert Settings tab at the top.
Select the Manage Contact Groups button.
Add
bigpandato the Assigned list.Click Save.
After modifying the Host Template, select Apply Configuration.
Service template assignment
From the side menu, go to Templates > Service Templates.
Search for the
generic-servicetemplate.Select the
generic-servicetemplate from the search result list.Select the Alert Settings tab at the top.
Select the Manage Contact Groups button.
Add
bigpandato the Assigned list.Click Save.
After modifying the Service Template, select Apply Configuration.
Uninstall the Integration
Deleting an integration requires changes to both the integrated system and BigPanda. You must uninstall the integration on the integrated system and then delete the integration from BigPanda.
Replacing an existing integration
When replacing an existing integration with a new tool or system, we recommend configuring the new integration first to ensure no data is lost.
Stop Sending Data to BigPanda
On the integrated system, disable any settings that send data to BigPanda.
Manually resolve any open alerts sent from the integration to remove the associated incidents from your incident feed. These incidents will not automatically resolve without an ok status from the original sending integration.
Stop Sending Data from BigPanda
In BigPanda, disable any settings that send data to the integrated system. This includes modifying or removing AutoShare rules or Environments that are tied to the integration.
Delete the Integration from BigPanda
In BigPanda, navigate to the Integrations tab and select the desired integration from the list.
In the integration details on the right of the page, click the trash icon, then confirm you want to delete the integration. The integration will then be removed immediately.
Data removal
This procedure does not remove any data from BigPanda or the integrated system. As needed, remove data from each system before deleting the integration.