xMatters
---
title: "xMatters"
slug: "xmatters"
excerpt: "Notify team members through XMatters when critical incidents occur."
hidden: false
---
Supported Versions | Type | Authentication Type |
|---|---|---|
<= Jun/Jul 2022 | API | User API Key |
This integration creates a sharing channel from BigPanda to xMatters. When a BigPanda incident has a change in status, an API call is triggered to xMatters with a payload. The payload arrives at xMatters' Integration Builder and an event is subsequently created, followed by recipient notification.
xMatters has two methods of notification:
User targeted: the user's device or devices will be notified. This recipient can respond with "Acknowledge" to read the details of the incident and then terminate the event.
Group targeted: the first active member in a group's roster will be notified. This recipient can respond with "Acknowledge" or "Escalate", which forwards the event to the next user in the escalation list.
AutoShare Configuration Separate
The xMatters integration follows standard AutoShare rules. See the Sharing Rules documentation for more information.
Key Features
Automatically notify recipients on a variety of devices when a correlated BigPanda incident is created.
Utilize xMatters to communicate via email, voice, SMS, and push messages to recipients.
Allows users to action correlated incidents by replying with "Acknowledge" or "Escalate" from their device.
Install the Integration
Create an app key
Create an app key in BigPanda.
Integration specific
You'll need a separate app key for each integrated system.

App key configuration in BigPanda
Install the workflow in xMatters
The BigPanda workflow will need to be installed within xMatters through the one-click installation process.
Within xMatters, go to the Workflow Templates page and click the BigPanda tile.
Provide a name and (optional) description for the workflow.
Click Install.
After the workflow installs, select the authentication option you want to use.
Copy the trigger URL. This will be used to configure the BigPanda webhook.
Configure BigPanda
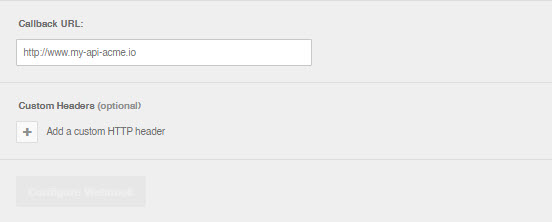
Paste the trigger URL from the previous step in the Callback URL field. Add any additional recipients to the recipients parameter in the URL.
If you do not use Basic Authentication, skip to Step 3. If you use Basic Authentication, generate the rest of the Authorization value by calculating the base64 of the username and password of the integration user you created in xMatters as
username:password. Click Encode and copy the result, then in the Authorization header paste after Basic .Click Configure Webhook.

Create an AutoShare rule based on your needs. This can be done on entire Environments or on a per incident basis. Please see Defining AutoShare Rules for more information.
Uninstall the Integration
Deleting an integration requires that you remove the integration in both the integrated system and BigPanda. We recommend that you first uninstall the integration on the integrated system to prevent traffic from being sent and rejected by BigPanda, since the app_key will not exist once you delete the integration in BigPanda.
Caution during replacement
When replacing an existing integration with a new tool or system, we recommend configuring the new integration first to ensure no data is lost.
Stop sending data from BigPanda
In BigPanda, disable any settings that send data to the integrated system. This includes modifying or removing AutoShare rules or Environments that are tied to the integration.
Delete the integration in BigPanda
Take the following steps to delete the integration from BigPanda:
In BigPanda, navigate to the Integrations tab and select the desired integration from the list.
In the integration details on the right of the page, click the trash icon, then confirm you want to delete the integration. The integration will be removed immediately.
️Data removal
This procedure does not remove any data from BigPanda or the integrated system. As needed, remove data from each system before deleting the integration.
Stop sending data from BigPanda
In BigPanda, disable any settings that send data to the integrated system. This includes modifying or removing AutoShare rules or Environments that are tied to the integration.
Delete the integration in BigPanda
Take the following steps to delete the integration from BigPanda:
In BigPanda, navigate to the Integrations tab and select the desired integration from the list.
In the integration details on the right of the page, click the trash icon, then confirm you want to delete the integration. The integration will be removed immediately.