Triage Incidents
Incidents in BigPanda represent a high-level issue occurring within your infrastructure. BigPanda digests all of the raw data from your integrated monitoring systems and automatically correlates this complex data into incidents.
The first step of incident management is triage. Triaging the incident allows you to determine priority, establish an assignee who will work on the incident, share the incident with others, merge duplicate incidents, and split incidents that represent multiple issues.
For more information about viewing incidents in BigPanda, see the Incidents in BigPanda and the Incidents Tab documentation pages.
Prioritize Incidents
Priority tags create a sortable hierarchy to mark the order in which incidents should be addressed. Priority tags make it easier to view the severity and urgency of your incidents at a glance.

Incident Feed with Priority Tags
Priority tags are visible in the Incident Feed and the Incident Details pane at the top left of the incident, next to incident severity. Priority can be assigned from either of these locations.
Priority tag names
The name of priority tags can be edited from within Settings > Incident Enrichment. When the name of a priority tag is changed, the change applies to all existing incidents as well as new incidents.
To learn more about how priority tags work in BigPanda, please see the Priority Tag Customization documentation.
Priority tags can also be used to sort incidents, allowing you to keep your eye on the most important and urgent issues.
Assign Priority
Priority tags can be assigned from both the Incident Feed and the Incident Details pane.
To assign a priority tag:
In the incidents tab, select the incident that you wish to assign a priority.
Select the Priority Tag Marker next to the incident’s alert count in the incident feed or in the incident details pane to open the priority tag dropdown.
Select the priority marker from the options.
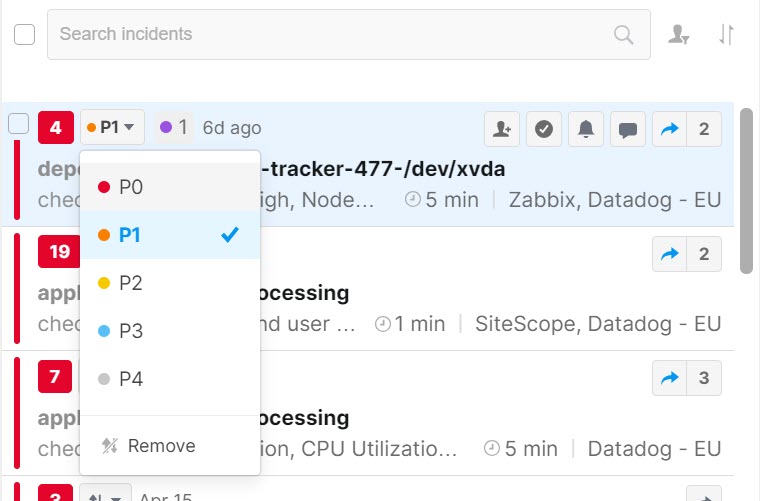
Priority tag dropdown
From the incident feed, you can assign priority to multiple incidents at a time by marking the checkboxes next to the relevant incidents and selecting a priority from the dropdown.
Sort by Priority
You can use priority tags to sort the incident feed, bringing the highest-priority incidents to the top.
To sort the incident feed by priority:
Navigate to the Incidents tab. Above the Incident Feed, select the Sort icon.
Select Priority.
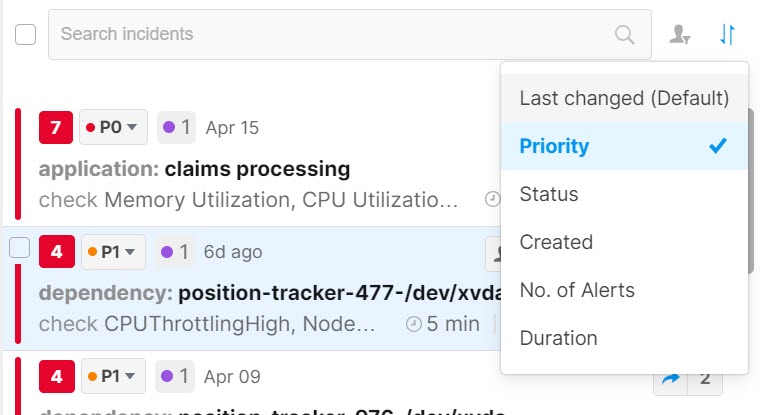
Sort by Dropdown
Default sort
Incidents that are not assigned a priority will be listed under the prioritized incidents by Last Changed.
Manage Priority Options
Priority settings can be customized to better fit the needs of your organization. To learn more about customizing priority tags please see the Manage Incident Enrichment documentation.
Assign an Incident
To ensure effective incident collaboration and management, assign each incident to a responsible party who will see the event through to resolution. If you are responsible for the incident, assigning it to yourself ensures that your teammates know it is being handled so they can focus on other incidents.
Incidents can be filtered and searched by the assignee to make it easy to keep focused only on relevant tasks.
To assign an incident:
In the incident feed, hover over the incident which you wish to assign to yourself or another person.
Click the Assign Incident icon on the right side of the incident. Or, select an incident, and then click Assign Incident at the top right of the incident details pane.
Select the BigPanda user you want to assign the incident to. Select your name to assign the incident to yourself.
Assignment list
When the list opens, your name appears at the top.
Once the incident has been assigned:
The assignee's initials or profile image appears on the incident.
The assignment is added to the activity feed.
When you hover over the assignee's initials or profile image, you can see the assignee's name, who assigned them the incident, and when the incident was assigned to them.
Filter by assignee
You can filter the incident feed by assignee to see all incidents assigned to a specific operator or filter the feed to see all incidents assigned to you.
See the Filter by Assignee documentation for more information.
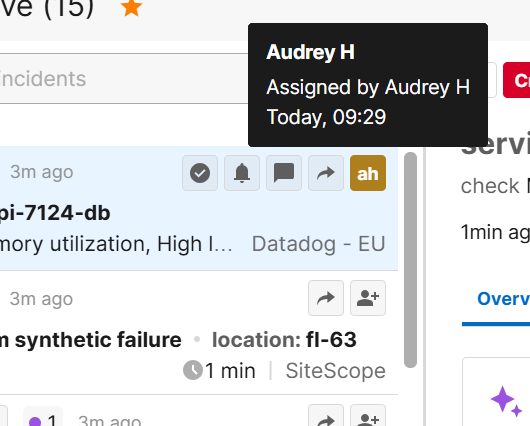
Assignee Information
Assign multiple incidents
You can assign multiple incidents at the same time by using the bulk actions selection boxes.
Reassign Incidents
You can reassign an incident to a different assignee, or remove the current incident assignment and leave the incident unassigned.
To reassign an incident:
On the incident, select the current assignee's profile image.
From the dropdown list, select the person you want to reassign the incident to.
To remove the current assignment without assigning it to a new user, select Unassign.
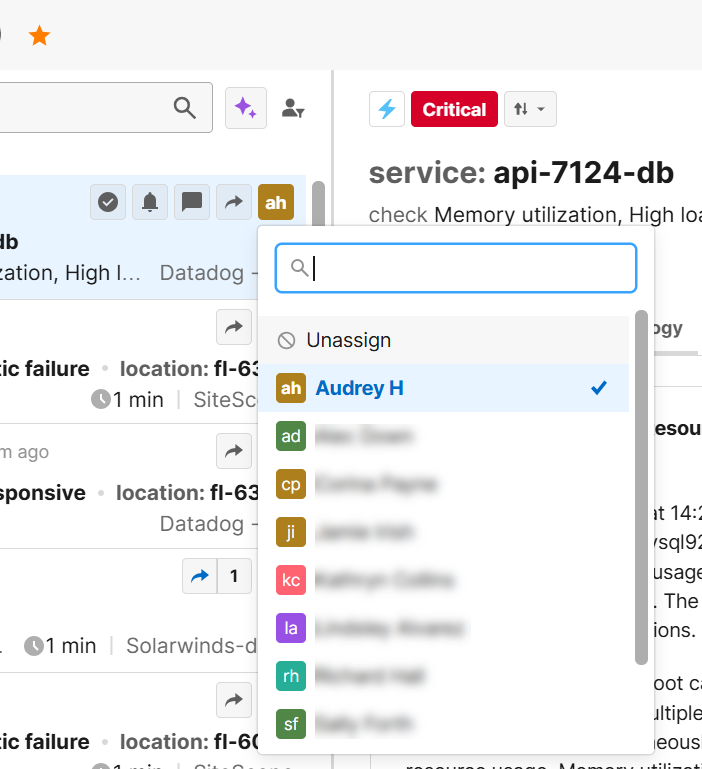
Reassigning incidents
Assignments for resolved and reopened incidents
When an incident is resolved, it remains assigned to the same user to ensure that the information is available for searches and historical investigations. If the incident is reopened, the incident is automatically assigned to that same user. For more information about when incidents are reopened, see Incident Life Cycle Logic.
Share Incidents
BigPanda incidents can be shared through email or integrated channels to maximize collaboration and streamline resolution workflows. Incident sharing allows you to efficiently notify your team of critical issues, automatically create tickets, or loop in team members who don’t use BigPanda.
Shares include detailed information on the incident including the status, subject, and each active alert in the incident. The share will also include links to the BigPanda incident and a simplified Incident Preview for easy review.
By default, BigPanda can share incidents through email or SMS. Additional sharing channels can be configured to send BigPanda incidents to your team’s ticketing and collaboration systems. To learn more about setting up sharing channels, see the Manage AutoShare documentation and the Collaboration Integrations list.
Incidents can be shared manually from the Incident Feed at any time. AutoShare rules may also have been configured to automatically share Incidents that meet certain conditions to specific recipients. To learn more about creating AutoShare rules for incidents, see the AutoShare Configuration documentation.
Export an Incident
Incident details can be exported in CSV or JSON format from the Incident Details pane.
View Existing Shares
Incident shares can be viewed from the Incidents Tab.
The blue share icon will appear in the incident feed or top right actions bar for any incidents that have already been shared manually or through AutoShare. Beside the blue arrow, the number of shared recipients will be listed.
Shares will also appear in the Incident Details pane on the Overview tab within the Activity feed.
Click the number beside the blue share icon to view sharing details.
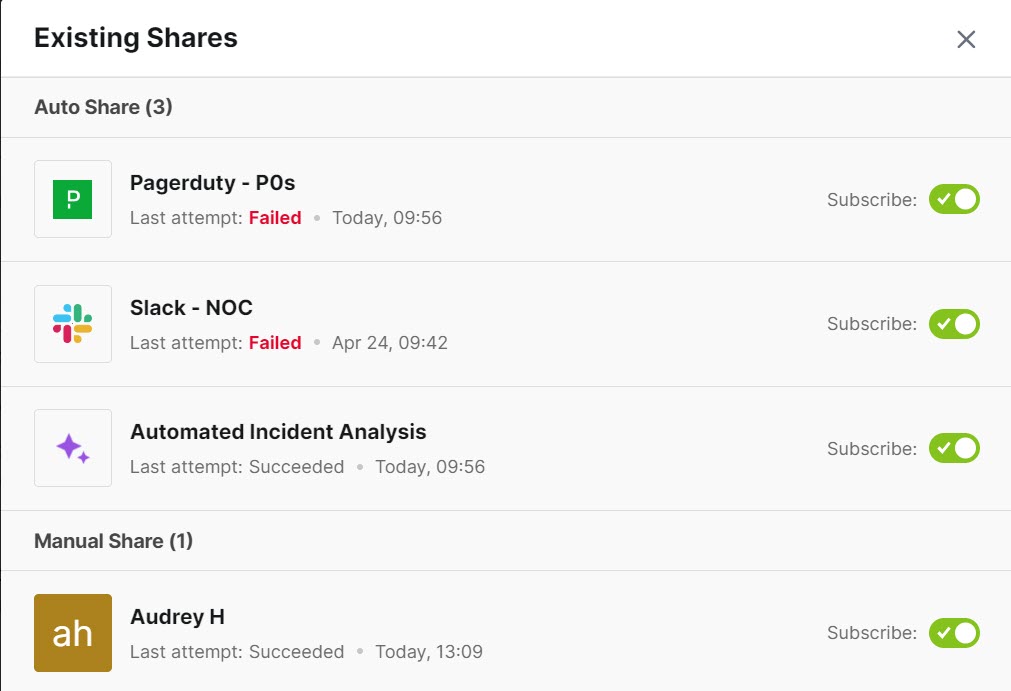
Existing Shares Window
The sharing details popup includes the sharing history and subscriber information for the incident, including:
How many times the incident has been shared, broken out into a Manual Share and AutoShare section.
The recipient of the share.
When each share was first sent.
If the incident was manually shared, and which user shared it.
Whether the last attempt to share with the recipient was successful.
Whether the recipients are currently subscribed to receive updates on the incident.
If the incident was shared with an external ticketing system, the current status of the ticket in the target system and a direct link to it will both be listed.
Incident Preview
When an incident is shared, BigPanda includes a link to an incident preview page where recipients can see the latest incident status without logging in to BigPanda.
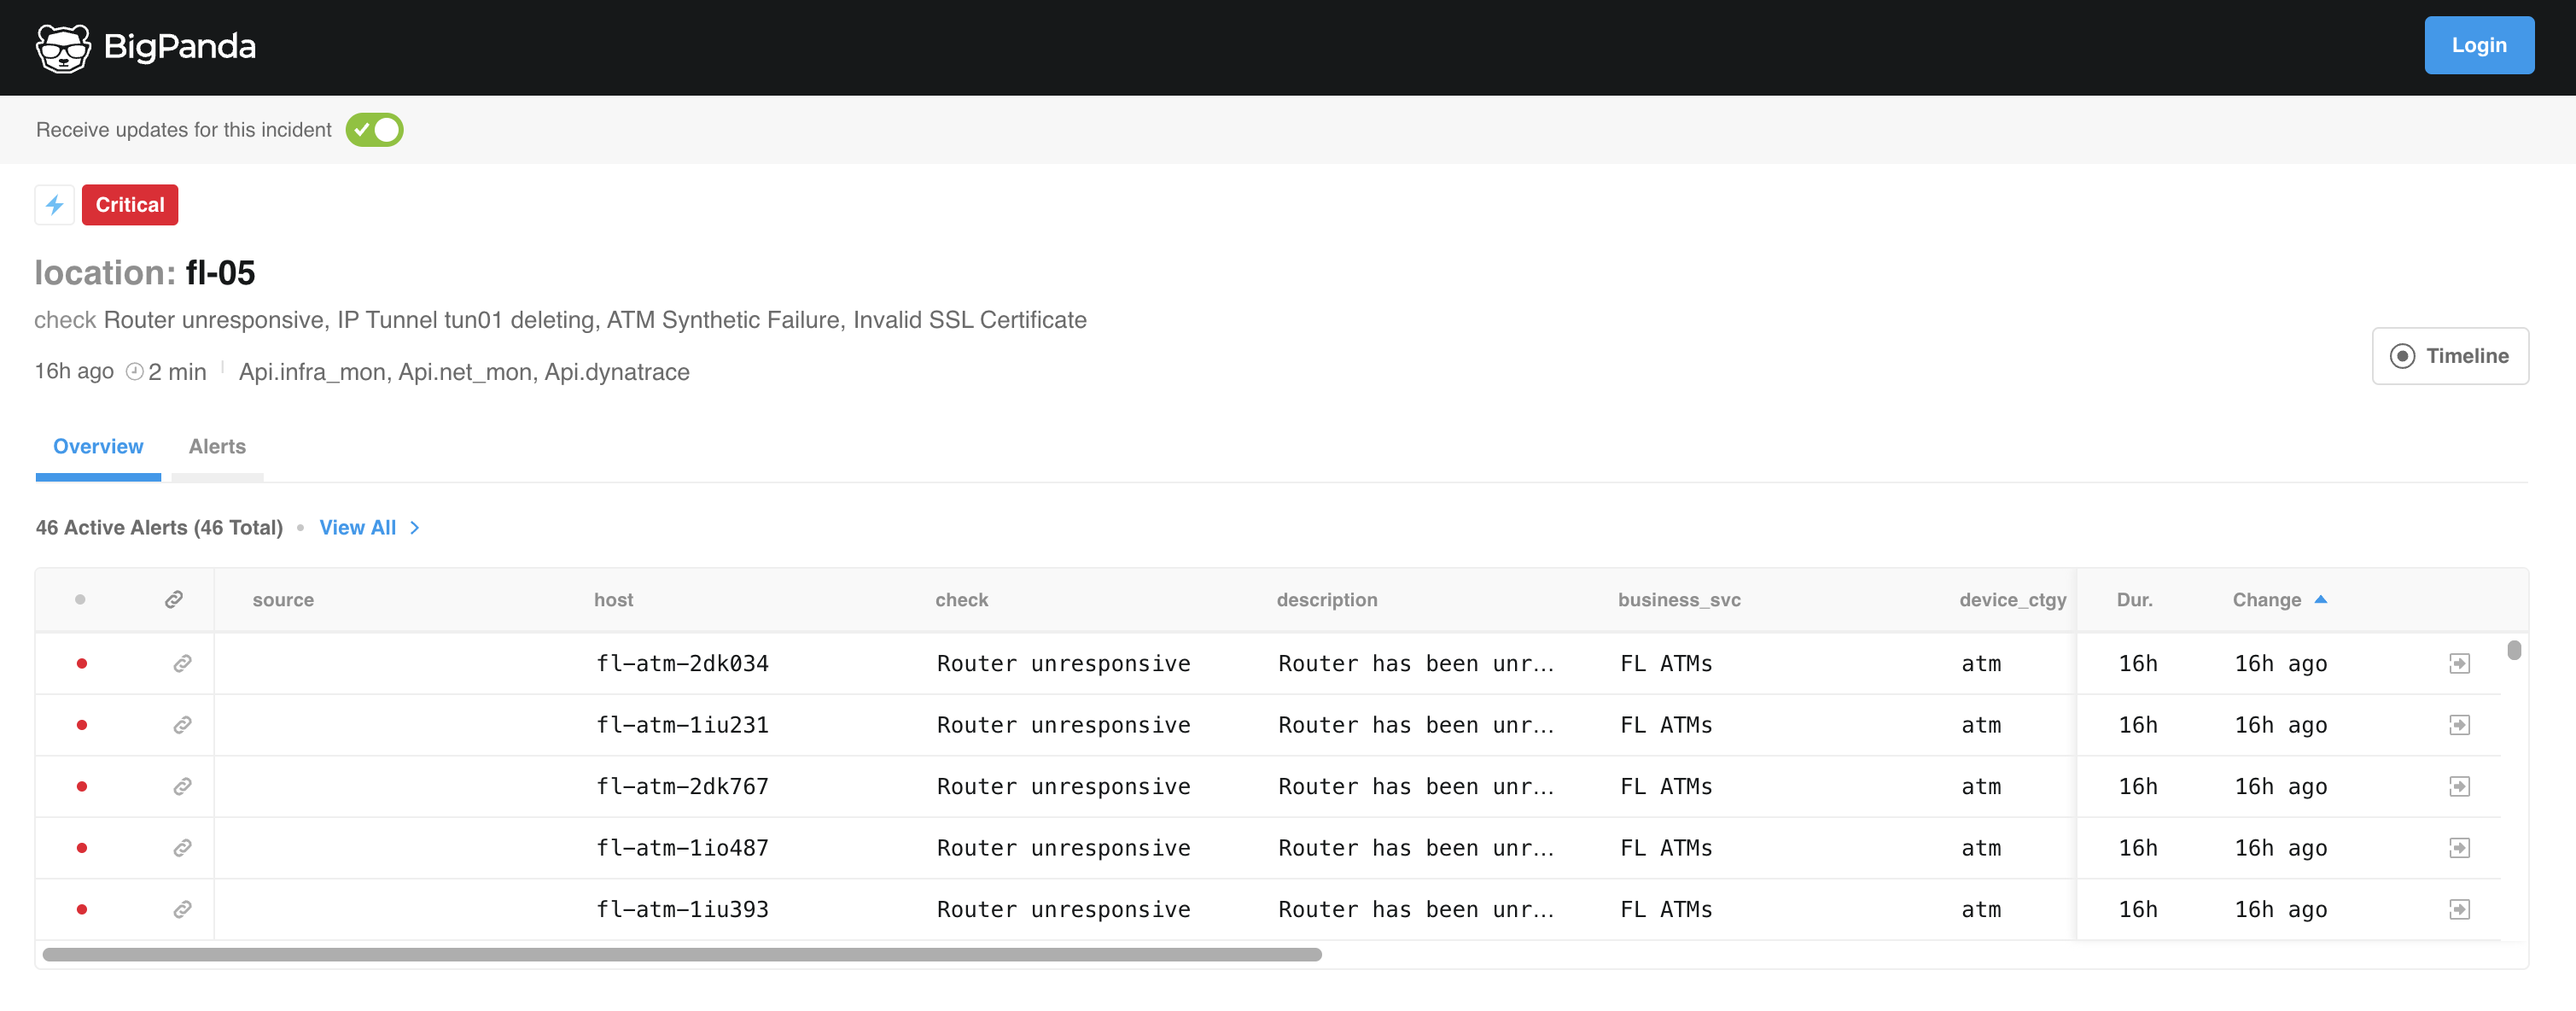
Incident Preview Page
To open an Incident Preview:
Open the email, SMS, ticket, or message where the incident was shared
Click View Updated Incident or click the link listed on the Preview line
Preview link
The incident preview link does not require authentication, and can be reshared to multiple users. The link remains active for 30 days.
The incident preview is updated in real time as the incident evolves and includes key information on the type of events noted, status of the incident, and the source system of the triggering events.
The full list of active alerts in the incident as well as the incident timeline are included in the preview.
Incident Updates
Once shared, recipients will be updated when key changes happen. This ensures teams collaborating together externally are always working from the latest BigPanda data. Users can unsubscribe from incidents to stop receiving updates.
BigPanda sends information to the subscribed recipients of a share when:
The incident status has changed.
An incident tag is added or removed.
An incident is split or merged.
A new alert is correlated into the incident.
The incident enters or exits a snoozed state.
The incident enters or exits a flapping state.
The incident closes.
Webhook Update Rules
Integrations that use the Notifications Webhook follow different sharing rules. Notification Webhooks automatically send an update sync every 2.5 minutes with all changes since the last update. This update is sent regardless of flapping status.
Export Incident
Export incident and alert details as a CSV or JSON for custom sharing or analysis.
Incident reports can include:
basic incident information
timeline and data metadata
alert details
alert tags and properties
activity and escalations
correlation and pattern matching
time offsets
some incident tags
Incident details only
Incident reports can only be exported from the Incident Details pane. Select an incident to begin exporting.
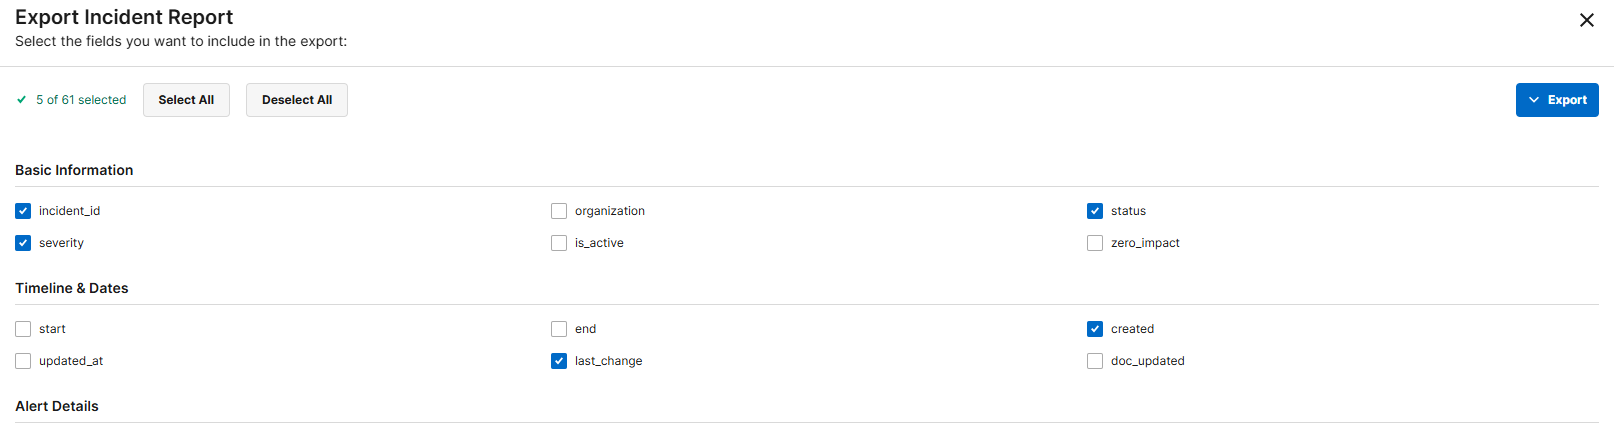
Export Incident Report pane
To export an incident:
In Incident Details, click the Export icon at the top of the feed to open the Export Incident Report popup.
(Optional) If you would like to change which details are included in the report, select or unselect data fields. You can Select All or Unselect All.
From the Export dropdown, select either CSV or JSON export format.
The incident report fields you select are saved to your user profile and will automatically populate the export incident report options the next time you open the export pop-up.
Merge Incidents
Merging enables you to add the alerts from one incident to another, so that the combined alerts can be handled as a single incident.
When merged, all the alerts in the source incidents (along with their history) are moved to the destination incident. After a merge, source incidents will no longer contain any alerts, and will be resolved and removed from the incident feed.
Maximum alerts
The maximum number of alerts that can be correlated into a single incident is 300. If the combined number of alerts in the incidents being merged exceeds 300, the merge will fail.
The destination incident maintains its assignee and snooze settings. If the incident is shared, all changes made to the incident are updated and shared in real time.
To merge incidents:
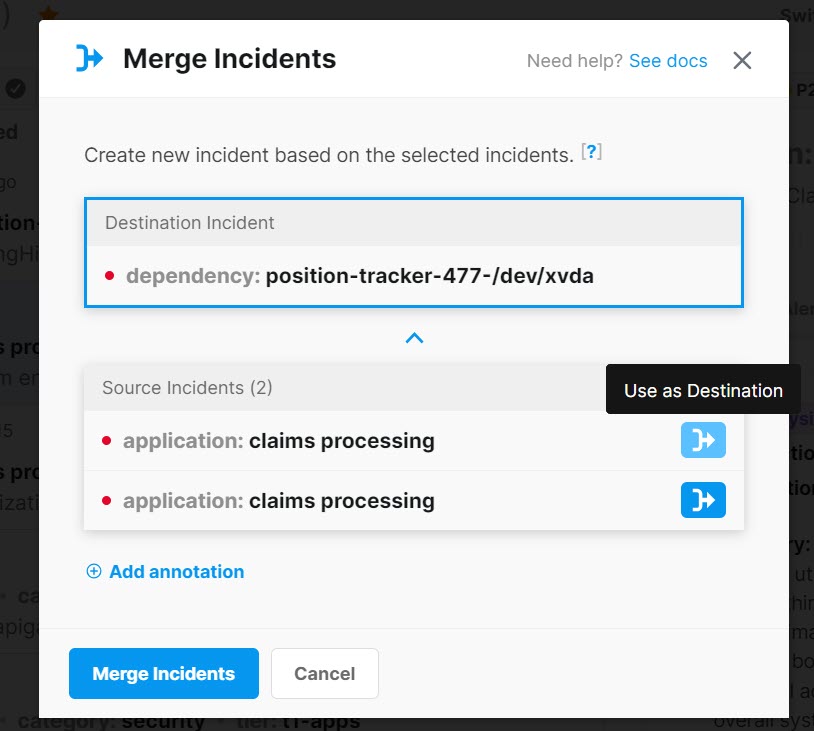
In the Incident Feed, select incidents and click the Merge icon at the top of the feed to open the merge popup.
(Optional) If you would like to change the automatically selected destination, manually change the source incident you would like to assign as the destination by clicking Use as Destination icon.
(Optional) Select Add annotation to add a note describing the reason for the merge.
Click Merge Incidents. The merged incident now appears in the incident feed, marked with a "Manual" badge.
Split Incidents
You can split an incident to separate the alerts out into multiple incidents.. Incidents may need to be split when:
The algorithm grouped together alerts that were not closely related.
Multiple factors led to the creation of the incident.
Certain alerts within the incident were resolved.
When splitting an incident, selected alerts from source incidents are moved (along with their history) to the newly created destination incident. The source incidents maintain their assignee and snooze settings. If the source incident is shared, any further updates to the alerts that remain in the original incident after the split are sent in real time.
The newly created destination incident is subject to the same rules as any other new incident in the system.
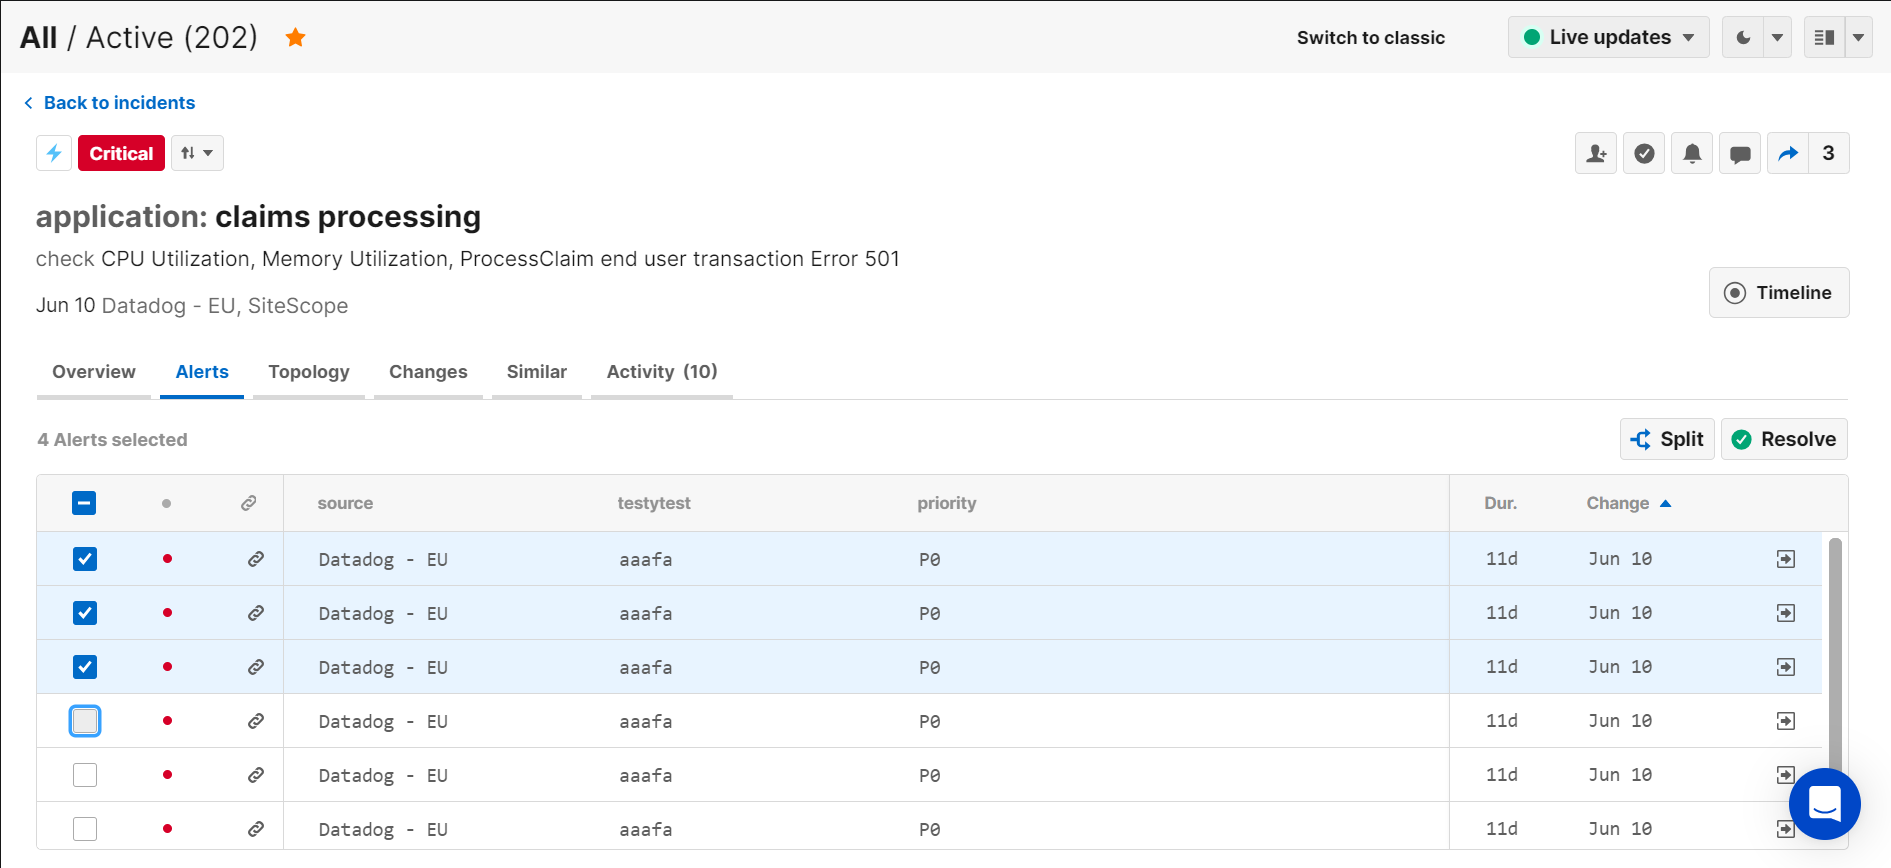
To split an incident:
In the Incident Details pane on the Alerts tab, select the alerts you would like to split out. Click Split at the top right of the Alerts table to open the split pop-up.
Splitting all alerts
You cannot split out all the alerts in the incident.
Click Split. The split incident now appears in the incidents feed. Both source and destination incidents are marked with the
Manualbadge.
Manual incidents
After merging or splitting, because incident correlation was manually intervened, all split incidents will be marked Manual. Manual incidents will no longer be included in automatic correlation, meaning no new alerts will be added. Existing alerts will still be updated.
Snooze an Incident
Snoozing an incident removes it temporarily from the incident feed.
Snoozing non-urgent incidents can help keep your team focused on the right issues. For example, a low disk space issue can often wait weeks before it becomes urgent. If you are not planning to do anything about a low-priority issue right now, it can be helpful to get it out of the way.

Snoozing an Incident
To snooze an incident:
Navigate to the incident you would like to snooze, and select the Snooze bell icon.
Configure the snooze:
Snooze for—select how long the incident should be removed from view. The maximum amount of time an incident can be snoozed is 90 days.
Add annotation—(optional) enter a comment to appear in the incident activity feed.
Cancel snooze on new alerts or critical updates toggle—select the check box to automatically cancel the snooze if:
A new alert is added.
The severity of an existing alert increases such as when an alert changes from warning to critical.
The incident is resolved.
Clear the check box to keep the incident snoozed until the snooze period elapses, regardless of updates to the incident.
3. Click Snooze.
The incident no longer appears in the incident feed. When the Snooze period ends, the incident again appears in the active feed.
Cancel actions
Make a mistake? Incident actions that change how incidents are viewed or organized can be canceled for 5 seconds after the action was taken. An Undo button will appear at the bottom left of the screen.
View Snoozed Incidents
To see all the snoozed incidents, click the Snoozed folder in the left pane. To cancel the snooze or to change the snooze period, click the bell icon.
Perform Actions on Multiple Incidents
Bulk Actions
You are able to perform actions on multiple incidents at once.
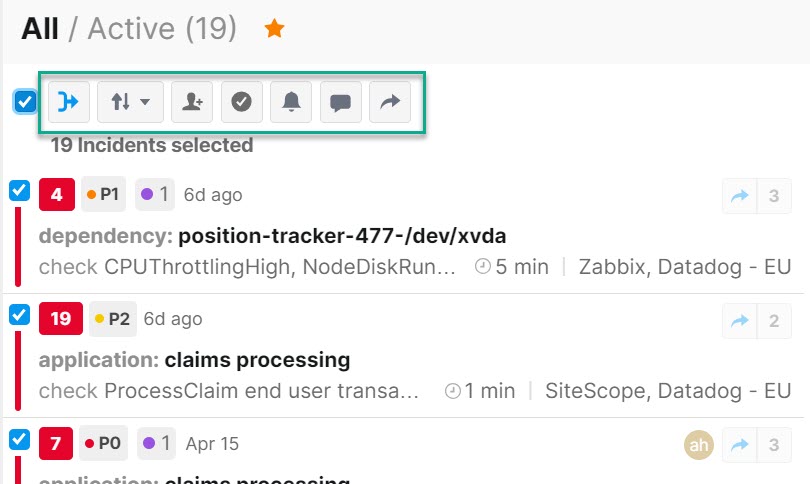
You can prioritize, merge, assign, resolve, snooze, comment on or share multiple incidents at the same time with the bulk actions pane.
(Optional) Perform a search to show all applicable incidents in the feed.
Select the check box beside each relevant incident, or select the check box to the left of the search box to select all displayed incidents. The bulk actions pane appears and shows the number of incidents selected and the actions you can perform.
To select consecutive incidents, select the first incident, then press Shift and select the last incident. The incidents and all incidents between them are selected.
To see the details in the right pane, click an incident in the feed.
To clear all incident checkboxes without performing an action, click the Deselect all check box at the top left of the pane. You must clear all selections to hide the bulk actions pane and enable the actions on individual incidents.
Click the icon for the action you want to perform.
Merge - Group incidents together to be handled as one incident.
Priority - Change or add a priority on all selected incidents.
Assign - Assign the incident to an owner who will be responsible for seeing it through to resolution.
Resolve - Mark the issue as ended.
Snooze - Snooze active incidents; cancel or change the settings for snoozed incidents.
Comment - Add a comment or view previous comments from your colleagues.
Share - Share an incident to collaborate with key team members.
Fill in the details and complete the action as you would for a single incident.
Performing bulk actions
You can perform bulk actions only on incidents that appear in the feed at the same time. The bulk actions pane covers the search bar, preventing you from doing searches after selecting incidents.
Next Steps
Start Remediating Incidents
Learn more about Navigating the Incidents Tab
Dig into The Incident Life Cycle